Onward Ticket for Immigration — Airline Checks & When Proof of Exit Is Required

When Immigration and Airlines Demand an Onward Ticket (And How to Pass the Check)
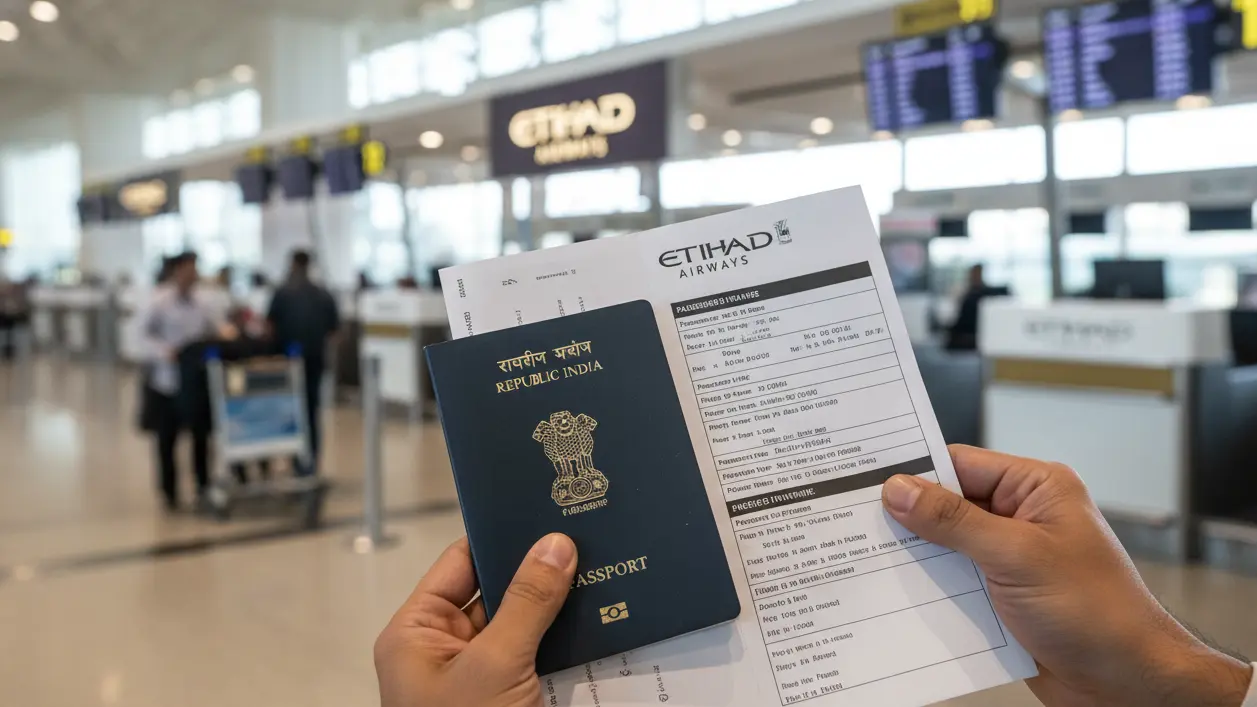
You reach the counter with a valid visa, a calm plan, and a suitcase that closes. The agent types for ten seconds, looks up, and asks for proof that you will leave, even with an approved visa. Online check-in already refused to issue a boarding pass, and the queue behind you gets louder. This moment is where trips die, not at immigration. A dummy ticket can prevent this hassle by providing verifiable proof of onward travel.
We will map exactly when airlines check onward travel, when border officers care, and how transit stops change the rules mid-route. You will learn how to match dates to permitted stay, choose the right strength of proof for your itinerary, and present it in the order that agents accept fastest. We will also cover the uncommon cases that trigger supervisor calls. Stay in control today. For more insights, check our blogs or visit our About Us page. Need a verifiable onward flight PDF at check-in? Use this dummy ticket with a verifiable PNR before you reach the counter.
Onward ticket for immigration is essential for travelers in 2026—avoid denied boarding, airline fines, and immigration refusal by presenting valid proof of exit instead of buying full tickets upfront. 🌍 It clearly demonstrates your intent to leave the country within allowed stay periods, aligning with airline and border control rules without financial risk.
A professional, PNR-verified onward ticket for immigration helps you pass airline check-in and immigration checks smoothly, ensures your travel dates and name match your passport, and prevents last-minute travel disruptions. Pro Tip: Always ensure your onward ticket date falls within your visa or visa-free stay limit. 👉 Order yours now and travel with confidence.
Last updated: January 2026 — Verified against current airline boarding rules, immigration entry policies, IATA standards, and real traveler experiences.
When planning your visa application, incorporating a dummy ticket early can streamline the process significantly. A dummy ticket serves as temporary proof of onward travel, allowing you to demonstrate your travel intentions without committing to expensive, non-refundable flights. This is particularly useful during the initial stages where flexibility is key. Tools like a dummy airline ticket generator with PNR enable you to create realistic itineraries that mimic actual bookings, complete with verifiable details. By using such a generator, you avoid financial risks associated with purchasing real tickets that might need changes if your visa timeline shifts. This approach not only satisfies embassy requirements for proof of return or onward journey but also gives you peace of mind. Start by selecting routes that align with your intended stay duration, ensuring the dates fall within permissible limits. Remember to include passenger details accurately to match your passport. Once generated, download the PDF immediately for easy access. This method has helped countless travelers submit strong applications without unnecessary costs. To enhance your preparation, cross-reference with official guidelines from sources like the IATA for airline policies. Ultimately, a well-crafted dummy ticket positions you for approval, letting you focus on your trip. Ready to proceed? Explore options that offer instant generation and unlimited edits to tailor your proof perfectly.
Who Actually Enforces “Onward Ticket” Rules — And Why You Feel It at Check-In First

Airlines ask for proof of onward travel for one reason: liability. If you land and are refused entry, the carrier can be required to transport you back and may face penalties. A dummy ticket provides a simple solution here.
The Airline’s Problem: “If You’re Refused Entry, We Pay” (And How That Shapes the Questions)
That is why the question is usually direct. The agent is not evaluating your dreams. They are trying to make a fast, defensible “board or no-board” decision that they can record against a specific rule set for your destination and any transit points.
It also explains why a valid visa does not always end the conversation. If you are flying on a short-stay tourist visa, a visa-free entry permission, or an electronic travel authorization type entry, the airline may still need to see that you will depart within the allowed stay window.
On one-way itineraries to short-stay regimes like Schengen visitor trips, that extra check is common. The agent is protecting the carrier from being stuck with a return flight obligation.
So your job is to reduce friction. Show one clear onward document first. Make sure it displays your name, the departure date, and a reference the agent can accept quickly. Keep explanations short. Save extra context only if they ask.
If the agent asks, “Where are you leaving for?” answer with the city and date shown on your onward booking, not a vague region.
After they verify it, they usually note the clearance in your booking, which is why the gate agent often stops rechecking.
Immigration’s Goal Is Different: “Do You Look Like You’ll Overstay?”
Border officers use onward travel as a signal, not a checkbox. Upon arrival, an officer can weigh a broader picture. On a tourist entry, they may compare your stated length of stay to your onward date. On a residence or work entry, they may care more about your permit and less about a return ticket.
Airlines cannot do that. They have limited time and limited discretion. They prefer something readable and verifiable over a long explanation they cannot validate, especially when you are traveling to a destination with strict carrier checks.
This is why two travelers can report opposite experiences. Someone may enter without being asked for onward proof, while you still get challenged at departure on the same destination. Airline screening can be stricter than border questioning because the airline must decide before you ever reach the border.
A practical frame helps. Immigration is asking, “Will you leave?” The airline is asking, “Can we prove you will be allowed in?”
Transit Desks: The Hidden Checkpoint Most Travelers Forget
Many onward-ticket problems happen between flights.
If you transfer through an airport where you must re-check in, clear a transfer desk, or switch carriers, you may face a second document check. The next airline may not trust that the first airline verified anything, especially when tickets are separate.
Think of a long-haul into a hub, then a regional hop on another carrier. If the second carrier runs the transfer flow, they can ask for onward proof again, even if you already showed it at your first departure airport.
Transit can also change what “counts” as onward. If you must collect bags, change terminals, or exit the secure area, you may be treated as entering the transit country for process purposes. That can trigger new entry conditions and a new demand for proof of onward travel.
Use this decision rule: if your itinerary includes a carrier change, a self-transfer, or any step that resembles a fresh check-in, prepare to show onward proof again, fast, and without relying on airport Wi-Fi.
Why Online Check-In Is Your Early Warning System
Online check-in is a signal, not just a feature.
When the app refuses to issue a boarding pass and tells you to see an agent for document verification, the system could not confirm something important for your route. Often, that “something” is tied to entry eligibility, transit eligibility, or proof of exit for visitor-type entries.
On one-way trips, the system often flags you because it cannot confirm you will depart within the stay allowance. It sends you to a human who will ask for onward proof.
Treat that message as a heads-up. Arrive earlier than usual. Keep your onward proof easy to access. Expect questions that connect your length of stay to your exit plan.
Test check-in the moment it opens. If you get blocked, you still have time to fix gaps calmly instead of improvising at the counter.
Why the “One-Way Penalty” Hits So Hard
One-way tickets are legitimate, but they trigger extra scrutiny.
Airline logic is blunt. A round-trip shows a clear exit plan. A one-way forces the carrier to confirm that you can leave within the permitted stay. That is especially true for tourist-style entries, visa-free trips, and visa-on-arrival style permissions where onward travel is commonly checked.
Open-jaw trips can also get flagged. Flying into one city and leaving from another is often allowed, but it is harder for an agent to sanity-check quickly, so they ask for clearer proof.
There are also cases where one-way travel is normal, like long-stay visas, residence permits, student entry, and work authorization. Even then, you may be asked because the agent is not confident about how your visa class interacts with onward expectations.
The safest approach is to present a simple chain of logic in under a minute:
-
Your entry basis covers your stay.
-
Your onward plan falls within the allowed window.
-
Your onward proof is readable and verifiable.
A Decision Tree to Predict If You’ll Be Asked for Proof of Exit (Before You Book Anything)
Let's turn that logic into a decision tree so you can predict where the check will happen before you book anything. Start with the document that controls your stay length. Then ask one blunt question.
Start Here: What Is Your Entry Basis — Visa-Free, Visa-on-Arrival, eVisa, Sticker Visa, Residence?
Does your entry basis typically require “proof of onward or return” as a condition of entry?
For many visa-free and visa-on-arrival style entries, onward travel is commonly expected. Airlines often treat it as a hard requirement because it is easy to check and easy to justify. If you are entering on an eVisa for tourism, it can function the same way in practice. You may be allowed in without being asked at the border, but airline staff may still request it before boarding.
For sticker visas, the picture splits. A short-stay tourist sticker visa can still trigger onward checks. A long-stay sticker visa often reduces the need, but does not eliminate airline questions. Agents may not recognize every long-stay visa layout, and they may default to asking for onward proof if the trip looks like a visitor journey.
For residence permits, work authorization, and long-stay student entry, onward proof is less central. What matters more is whether your permission clearly supports the duration and purpose. Still, if you are flying one-way, a carrier can ask a simple “How do you leave later?” question as a sanity check, especially on routes that are known for strict pre-boarding document controls.
Use this fast classification:
-
Short-stay visitor entry (visa-free, VOA, many tourist eVisas, tourist sticker visas): assume onward proof can be requested at boarding.
-
Long-stay entry (student, work, residence): onward proof is less likely, but prepare a clean answer and optional proof if your trip is one-way.
Next: Are You Arriving With a Round-Trip, Open-Jaw, or One-Way?
Now look at what your ticket tells a stranger in 15 seconds.
Round-trip is usually the lowest-friction path because it answers the exit question without discussion. But it still fails in two cases.
First, your return date sits beyond your allowed stay. The airline may not do a deep calculation, but agents often spot obvious conflicts. If your stay allowance is 30 days and your return shows day 45, expect questions.
Second, your “return” is not a return. Some itineraries look like a round-trip on your screen, but appear as unrelated legs to an agent. Multi-city bookings can confuse this fast check, especially if the exit leg departs from a different country.
Open-jaw is next. It can be perfectly legitimate. It can also look messy if the connection between the arrival point and the departure point is not obvious. If you fly into Country A and plan to depart from Country B, you need to think like the agent:
Can you legally enter Country B?
Can you realistically reach Country B inside your permitted stay?
Does your outbound flight depart from an airport you can plausibly get to without violating entry conditions?
If any answer is unclear, you are more likely to be asked for proof, and you may need more than a single page.
One-way is the highest-friction option for visitor entries. It does not mean you will be stopped. It means you should plan for the question.
Here is a practical decision:
-
If you hold a visitor-type entry, one-way travel raises your odds of being asked at check-in or at the gate.
-
If you hold a long-stay permission, one-way travel may still trigger a check, but the agent is usually verifying that your entry basis makes sense, not demanding a return flight.
Then: Will You Transit Anywhere That Does Document Checks at the Gate or Transfer Desk?
This is where many smart itineraries become fragile.
Some airports run a transfer desk that re-checks entry eligibility for the next segment. Some airlines do not accept that another airline cleared you. Some routes routinely trigger gate checks because of destination controls.
Two factors raise the probability of onward questions during transit:
You switch carriers. Even on one ticket, a carrier change can trigger a new document scan, and with it, new questions. On separate tickets, expect it.
You have a self-transfer. If you must collect luggage and re-check it, you are effectively starting a new journey from the transit airport. That often causes the second check to be stricter than the first, because you are closer to the destination and the airline’s risk window feels smaller.
Run this test while planning:
-
Can you stay airside the entire time?
-
Do you have enough time to clear any transfer formalities if you are asked to show onward proof again?
-
Are you prepared to show onward proof to two different staff members in two different airports?
If your answer is “not sure,” build the itinerary assuming a second check will happen.
Channel Matters: Online Check-In, Airport Kiosk, Counter, or Gate
Where you check in changes the rules of the conversation.
Online check-in is binary. If it succeeds, you often skip the first human check. If it fails, you are being routed to a human because your route is flagged for document verification. That is not a moral judgment. It is a process trigger.
Kiosks vary by airline, but many still send flagged passengers to an agent. If the kiosk prints a “See agent” slip, it signals the same thing: manual verification.
Counter check-in is where staff have time to ask for onward proof and record it. If you want one clean verification point, this is often it.
Gate checks are different. The gate is a pressure cooker. Staff are focused on departure time. They prefer quick, unquestionable documents. If your onward proof is slow to open, stored in an email thread, or dependent on weak Wi-Fi, you are more likely to face delays.
So choose your strategy:
-
If you anticipate questions, do not aim to “wing it” at the gate.
-
Get cleared earlier at the counter if possible.
-
Keep your onward proof ready in a format you can open offline.
Risk Score Signals: Small Details That Raise Your Odds of Being Asked
Now we combine signals. None of these guarantees a check. But stacking them increases the chance.
Signal 1: A long stay on a visitor entry. A trip close to the maximum allowed stay invites “exit plan” questions, especially on one-way tickets.
Signal 2: A vague exit route. “We might go to a neighboring country later” is not proof. It may be true. It still triggers more questions because it is not verifiable at the moment.
Signal 3: A return that looks implausible. An onward flight at an odd time from an airport far from your arrival city can look like a placeholder unless your route logic is clear.
Signal 4: Separate tickets with tight timing. If you have to clear a transfer and present onward proof again, short layovers raise friction and make staff less flexible.
Signal 5: Story mismatch. If you say “one week,” your onward proof should not show “three weeks.” If you say “tourism,” your exit plan should not look like an indefinite roam with no date anchor.
Use a quick scoring method before travel:
-
Count how many signals apply.
-
If you have 0 to 1, you likely face minimal onward questioning.
-
If you have 2 to 3, prepare for airline staff to request proof.
-
If you have 4 or more, assume multiple checks and prepare a simple, clean proof pack.
Outputs: Three Likely Outcomes and What You Should Prepare for Each
Now we convert the tree into action. Pick the outcome that matches your route.
Outcome A: “Probably not asked, but carry backup.”
This is common with round-trips that align with stay limits and straightforward routing.
What to do:
-
Keep your onward confirmation accessible offline anyway.
-
Ensure the passenger's name matches your passport details exactly.
-
Keep the booking reference visible on the first screen or first page.
Outcome B: “Airline likely asks, immigration maybe.”
This often happens on one-way visitor entries or open-jaw routes where the exit is not visually obvious.
What to do:
-
Prepare a single onward document that shows: your name, date, route, and reference.
-
Align the onward date with your declared stay length.
-
Be ready to answer one follow-up question: “Where will you go after that?”
Outcome C: “Multiple checks likely, prepare a clean proof pack.”
This is common when you have a carrier change, self-transfer, tight timing, or a route with repeated document controls.
What to do:
-
Save your onward proof in two places on your phone and one offline method.
-
Keep a second supporting piece ready, such as your next leg confirmation if your itinerary is split across tickets.
-
Rehearse a 15-second explanation that matches the dates on the page you will show.
Building Onward Proof That Works Under Pressure (Immigration-Friendly, and Fast)

When you can place your trip into one of these outcomes before you book, you stop reacting at the airport and start controlling the process, which sets us up for the next step: building onward proof that works under pressure and gets accepted fast.
The “Two-Layer” Rule: Show Something Simple First, Keep the Complex Stuff as Backup
When a staff member asks for proof of exit, your first move should reduce their workload.
That means one clean document that answers three questions without scrolling: Who are you, when do you leave, and where are you going?
We call this Layer One. It should be a single PDF page or a single-screen confirmation that shows your name, the flight date, the route, and a booking reference.
Layer Two is what you keep ready but do not lead with. Layer Two exists for the follow-up questions that happen when your itinerary is unusual. Think open-jaw travel, onward from a different airport, or a transit that looks complicated.
Layer Two can include a second onward segment, a note of your permitted stay window, or a supporting itinerary view that makes the route logic obvious.
This two-layer approach matters because the person checking you might be a gate agent handling ten boarding issues at once. If you start with a long email chain or a multi-page itinerary, you increase the chance they miss the key line and ask you to step aside.
Use a simple sequence:
-
Present Layer One immediately.
-
Stay silent while they read it.
-
Only add Layer Two if they ask a specific question.
What Makes Onward Proof “Credible” in the Real World
Credibility is not about what you know. It is about what a stranger can verify quickly.
Three elements do most of the work.
First, a verifiable reference.
Airline staff trust things they can anchor. A booking reference, PNR, or confirmation code is an anchor. It gives them something to record and something that looks official inside their process.
If your document does not show a reference, it can still be real. It just creates more friction because it looks like a screenshot you could have typed.
Second, date alignment.
Your onward date should fit inside the stay you are requesting at entry.
If you are entering a country with a 30-day visitor visa and your onward flight is on day 29, the logic is clear. If your onward is on day 33, you may still plan to extend or exit by land, but you are now forcing the checker to judge a story instead of reading a date.
For Schengen travel, this matters even more because the stay calculation can be strict. An onward flight outside the allowed window invites extra questions at the airline counter.
Third, route plausibility.
Your own journey road should look like a real continuation, not a random city pair that makes no sense from your arrival point.
If you arrive in Paris and your onward flight departs from Madrid, it can be fine. But the checker may ask, “How will you get there?” Your Layer Two should make the connection obvious, such as a separate transport plan or a second flight segment.
Avoid onward routes that require entering a country you cannot enter. For example, an onward ticket that exits from a country where you do not have a transit or entry right can backfire. The staff member may treat it as not valid proof because it does not represent an achievable exit plan.
A quick plausibility test helps:
-
Does the onward flight depart from a place you can realistically be, legally and logistically?
-
Does the onward date match the trip length you will state out loud?
-
Does the route look normal for tourism, business, or transit purposes?
Verified Flight Reservation Format That Gets Accepted Quickly
Format decides speed. Speed decides outcomes when staff are busy.
Aim for a format that works in three environments: a bright counter screen, a rushed gate, and a border desk where phones are discouraged.
Best case: one-page PDF.
A PDF is stable. It does not depend on email loading. It is easy to zoom. It looks consistent across devices.
Name the file clearly so you can find it in seconds. Use a filename like “Onward Flight Confirmation 12 Mar” instead of “Screenshot_8472.”
Screenshots work, but only if they are complete.
If you use a screenshot, it must include your name and the flight details in the same frame. A cropped screenshot that only shows a route without passenger details invites rejection.
Also watch for truncation. Some apps hide the booking reference unless you scroll. If your screenshot does not show it, you may get asked for the full view anyway.
Email confirmations are risky at the wrong moment.
Email is fine when you have time. It is fragile when you do not.
Airports often have weak Wi-Fi. Roaming can fail. Search can be slow. If you have to open an email, use offline access and star the message before travel.
Name matching is not a small detail.
Some systems display names differently from passports. If your passport includes a middle name and your onward proof does not, it can still be fine, but you should expect a possible question.
What matters is consistency across your travel documents. If your passport MRZ line shows multiple given names, try to make sure your reservation reflects your full name in the same order.
If there is a mismatch, do not argue. Provide a second document that shows your passport name and explain that airlines often store names differently from passports.
The “48-Hour Rule of Human Behavior”: Why Last-Minute Proof Looks Suspicious
People judge timing, even when they should not.
If you buy onward proof five minutes before check-in, you create two problems.
First, you risk technical failure. The confirmation may not generate properly, or you may not receive the PDF in time.
Second, you look unprepared. That can trigger more questions because staff assume you are improvising.
We do not need to pretend every reservation was planned months in advance. But you want your proof to look settled, not rushed.
A practical guideline helps:
-
If you expect an onward check, secure and download your onward proof at least 24 to 48 hours before departure.
-
If you are changing plans closer to departure, keep the updated proof ready in the same format, not spread across apps.
There is one exception. Sometimes an airline asks for a specific kind of proof at the counter, and you need to produce it immediately. If that happens, the goal is not to look “planned.” The goal is to satisfy the requirement cleanly and quickly.
In that moment, focus on speed and clarity. Get the proof. Save it offline. Present the single page. Keep your explanation short.
Special Mention: How to Keep Your Onward Proof Accessible When Your Phone Fails
Phones fail at the worst times. Batteries drain. Apps log out. Screens crack. Airports block your signal.
Plan for that.
Use at least two offline storage points.
Save your PDF to your phone’s local files and to a second offline-accessible location, such as a documents app that keeps files locally.
Do not rely on a link that requires a login. If the checker sees you typing a password and waiting for a page to load, you lose momentum.
Carry one printed copy when your itinerary is high-friction.
Print is not always required, but it is immune to signal problems. It also works at borders that discourage phone use at the desk.
If you have a self-transfer, a complex open-jaw, or a one-way visitor entry on a route known for strict checks, print the first page of your onward proof.
Make retrieval a ten-second task.
Before travel, practice opening the file from your lock screen. Put it in favorites. Rename it. Put it in a dedicated travel folder.
If it takes you more than ten seconds to find the document at home, it will take longer in a crowded terminal.
Keep one backup on a second device if possible.
If you travel with a laptop or a tablet, store the same PDF there. If you travel with a companion, share a copy to their device too.
This is not about paranoia. It is about preventing a simple technical issue from turning into a missed flight.
In the midst of preparing for your journey, the convenience of obtaining a dummy ticket online cannot be overstated. Services that allow you to download dummy ticket PDF for visa provide secure, instant delivery directly to your inbox, ensuring compliance with stringent embassy standards. These platforms prioritize data security with encrypted transactions and verified PNR codes, making them ideal for travelers needing reliable proof without the commitment of full bookings. The process is straightforward: select your route, enter details, and receive a professional PDF that mimics real airline reservations. This eliminates the stress of last-minute purchases and potential refunds. Moreover, these dummy tickets are designed to meet international requirements, helping you avoid rejection at check-in or borders. With features like unlimited modifications, you can adjust dates as your plans evolve, all at no extra cost. This flexibility is crucial for visa applications where timelines may shift. Travelers worldwide appreciate the 24/7 support and quick turnaround, often within minutes. By choosing a reputable provider, you ensure your documentation is embassy-ready, boosting your application's strength. Remember to verify the ticket on airline websites for added assurance. This method not only saves money but also time, allowing focus on other travel aspects. If you're applying soon, consider this efficient option to enhance your chances of approval seamlessly.
Airline Checks in Practice — What They Ask, What They Type, and What Triggers “Supervisor”
Once your onward proof is built for speed, credibility, and easy retrieval, the next challenge is handling the human side of the check: what airline staff ask, what they record, and why some situations trigger a supervisor call.
The Agent Script Behind the Counter: What They’re Trying to Confirm in 30 Seconds
Most check-in conversations follow a tight script because airlines need a fast compliance decision.
You will usually hear some version of these prompts:
-
What is the purpose of your trip?
-
How long will you stay?
-
Where will you stay?
-
Do you have a return or onward ticket?
These questions are not a personality test. They map to three risk checks.
First, does your purpose match the entry type you are using? A tourist entry paired with “I might work remotely for months” can trigger extra screening.
Second, does your stay length fit a normal visitor pattern? A long stay with a one-way ticket draws attention even if it is legal.
Third, does your exit plan exist and match the timeline?
Your best answers are short and date-anchored.
If you say “ten days,” you should be able to point to an onward date within that window. If you say “two weeks,” your onward should not be a month later.
Also, keep your answers consistent with what your documents show. If you are carrying a Schengen visa for a specific period, your stated stay should not exceed it. Agents may not calculate day counts, but they do spot obvious mismatches.
Here is a simple response format that works in most airports:
-
Purpose: “Tourism.”
-
Duration: “Nine nights.”
-
Exit: “Flying out on 18 March to Athens.”
Then show the onward proof without waiting to be asked again.
Document Verification Systems and Why Your Itinerary Gets “Held”
Many airlines use internal document verification steps that you never see.
You feel it when the agent pauses, types, and your booking looks “stuck” for a moment. Sometimes they scan your passport, and the system prompts extra questions.
This usually happens for one of three reasons.
Reason 1: Destination control routes.
Some destinations have stricter carrier checks for visitor entries. The airline system may require the agent to confirm return or onward travel before issuing the boarding pass.
Reason 2: Transit complexity.
If your itinerary includes transit in a country with conditional transit rules, the system may flag your booking for manual review. Even if you stay airside, the airline may still need to confirm that your onward leg exists and is valid.
Reason 3: One-way on a visitor pattern.
Some systems treat a one-way visitor trip as incomplete. They prompt the agent to verify onward proof because it reduces the risk of being refused entry.
When you get “held,” do not fill the silence with explanations. The fastest way through is to let the agent complete their checks and then answer only what they ask.
If the agent asks for onward proof, hand over Layer One first. Let them read. Then respond.
The Top Triggers for Denial of Boarding Related to Onward Travel
Denial of boarding is rare, but the triggers are predictable. The common thread is that the airline cannot defend against boarding you if something goes wrong on arrival.
Here are the triggers that most often cause a hard stop.
Trigger 1: Your onward date exceeds the allowed stay.
This is the most straightforward. If your entry basis allows 30 days and your onward is after that, the airline is taking a risk.
If you plan to extend, you might still be allowed by immigration. Airlines rarely want to bet on that. They prefer an onward date that clearly sits inside the allowed stay.
Trigger 2: Your onward departure from a place you cannot reach legally.
This is common with open-jaw plans that cross borders. If your onward flight leaves from a neighboring country, the agent may ask whether you can enter that country.
Example: you arrive in Country A, and your onward departure is from Country B. If you do not have entry permission for Country B, your onward travel does not prove that you can exit.
Trigger 3: Your onward route is internally contradictory.
This looks like “tourism for one week,” paired with an onward flight four weeks later. Or “business meeting for three days,” paired with a multi-stop itinerary that suggests something else.
Airline staff do not need to prove you are lying. They only need to decide that your risk profile is unclear.
Trigger 4: Your onward proof is not readable or incomplete.
A cropped screenshot with no name, a blurry image, or a confirmation without a reference can be rejected because the agent cannot document what they verified.
Trigger 5: Separate-ticket self-transfer with no buffer.
If you must clear transfer procedures and present onward proof again, a short layover can turn into a missed connection and a bigger compliance risk. Some agents become more conservative when they see tight timing plus separate tickets.
Use this quick “deny boarding risk” checklist before you travel:
-
The onward date is inside the permitted stay
-
Onward departs from a place you can legally be
-
Your stated trip length matches the onward date
-
Proof shows your name and a reference without scrolling
-
Your transit plan does not depend on unrealistic timing
If you fail two or more of these, prepare for extra questions and do not rely on online check-in alone.
How to Handle “We Can’t Accept This” Without Escalating the Situation
When an agent rejects your onward proof, treat it like a technical problem, not a personal conflict.
Start by getting precision.
Ask: “What part is missing for acceptance here, the date, the route, the passenger name, or the reference?”
This forces the conversation into a fixable category.
Then offer the simplest alternative format you have.
If you showed a screenshot first, offer the PDF. If you showed an email, offer an offline file. If the reference is not visible, open the confirmation view where it is clearly shown.
If they still hesitate, ask for the requirement in plain terms.
Try: “If I show an onward booking that departs within my permitted stay and includes my name and a reference, will that meet your check?”
This matters because some agents reject a document due to format confusion, not because they are refusing the concept.
If the agent mentions “policy” without details, ask for a supervisor calmly. Do not demand. Ask.
Say: “Can we confirm the exact requirement for this route with a supervisor so we meet it correctly?”
In many airports, the supervisor does not override the rule. They clarify what the system is asking the agent to record.
If you need to adjust your plan on the spot, keep your story consistent. Do not suddenly change your trip length and purpose in a way that conflicts with what you already said.
Airline staff notice narrative shifts quickly, and it makes them less willing to accept a quick fix.
Real Scenario: Departing From Delhi on a One-Way Ticket With Online Check-In Blocked
If you are departing from Delhi on a one-way tourist itinerary and the airline app refuses to issue a boarding pass, expect a counter check that focuses on onward travel and stay duration.
The fastest path is to present Layer One immediately when asked. Use a one-page document that shows your name, onward date, route, and a reference.
Keep your answer tight: “Tourism, nine nights, onward flight on 18 March.”
If your onward departure is from a different city than your arrival, be ready with one supporting item that explains how you reach that departure city, such as a second flight segment or a clear itinerary view.
Do not hand over a phone full of tabs. Open the single file, zoom to the date and reference, and let the agent do their job.
When Immigration Actually Requires Proof of Exit — And When They Don’t (But Ask Anyway)
Once you know the counter script and the common triggers, the next question becomes more nuanced: when immigration actually requires proof of exit, and why they sometimes ask even when the rule is not explicit.
Countries With Explicit Onward/Return Conditions vs. Discretionary Questioning
Some entry regimes make onward or return travel an explicit condition for short-stay visitors.
That often shows up in visa-free travel programs like the US ESTA flow, where US CBP can ask how you plan to depart within your authorized period. It also shows up across many visa-waiver style entries in places like Japan’s Temporary Visitor admissions and Singapore short-stay entries, where immigration questions can focus on “how long” and “when do you leave.”
Other places treat onward proof as discretionary even when it is commonly requested in practice, such as Schengen border checks for short-stay tourism, where officers may ask for an exit plan as part of verifying that your stay fits the 90/180 framework.
The practical difference is how you prepare.
If the destination is known for “show it if asked” enforcement at the border, you can sometimes rely on a coherent plan and supporting documents. If the destination routinely asks for a fixed departure date for a visitor entry, you should expect the officer to prefer a clean, date-specific onward flight.
The phrase “may be required” is the trap.
When you see “may be required” in entry conditions for a visitor stay, it often means the officer can ask for it without warning, especially when you arrive with a one-way ticket or an unusually long stated visit.
So we treat “may” like “prepare for it,” and we treat “must” like “lead with it if asked.”
What Immigration Is Really Testing When They Ask for Onward Proof
When a border officer asks for onward travel, they are usually testing one of two things.
First, can you leave inside the stay you are requesting for that entry type, like a Schengen short-stay, a UK Standard Visitor entry, or a Canada visitor entry on an eTA-based arrival.
Second, does your behavior match the story you are telling at the desk, like “tourism in Spain for 10 days” or “business meetings in Dubai for 4 days”
Onward proof is a shortcut. It anchors your timeline.
If you arrive at a Schengen airport and say “a week in Italy,” an officer can glance at an onward date to confirm you are not quietly planning a 6-week stay that conflicts with your profile.
If you land in the US on a B-2 visitor admission and your onward is not clear, a US CBP officer may ask more questions about funds, work ties, and where you will be on specific dates, because there is no fixed exit anchor.
If you arrive in the UK as a Standard Visitor and your return date is vague, UK Border Force may shift from “how long” to “why this long” and “how will you support yourself,” because the exit plan is part of credibility.
This is why a perfect onward flight can still lead to questions.
If your onward date is fine, but your answers are inconsistent, the officer is not satisfied. If your answers are clear but your onward plan is vague, the officer may still be satisfied if your overall story is credible and you can support it.
So we treat onward proof as one part of a credibility bundle, not a magic shield.
The “Arrival Narrative” That Reduces Onward Scrutiny
Immigration interviews go smoother when your timeline is simple, and your reasons are specific.
A strong arrival narrative has three parts, and each part fits the visa or entry type you are using.
Part one is purpose, stated in plain language that matches the entry, like “tourism in Portugal,” “family visit in Toronto,” or “conference in Singapore.”
Part two is duration, stated as a number that matches your onward date, like “nine nights” or “two weeks,” not “a while.”
Part three is exit, stated as a date and city pair that matches your onward flight, like “departing from Madrid on 18 March.”
This matters more in high-traffic ports where officers move fast, like Schengen airports at peak season, US preclearance lanes, or major Middle East hubs.
It also matters when your itinerary has a detail that invites follow-ups, like entering France but departing from Amsterdam, or arriving in Bangkok and departing from Phuket.
If your route is open-jaw, your narrative must connect the dots. If you arrive in Barcelona and depart from Paris, your plan should include the internal travel step in one sentence, like “train to Paris mid-trip, then fly out.”
Avoid narratives that sound like you are negotiating with yourself at the desk.
At a Japan immigration desk under a Temporary Visitor admission, “we will decide later” can trigger a longer conversation than “we will be in Tokyo for five nights, Osaka for four, and fly out on 18 March.”
At a Schengen border, “we might extend” can trigger questions about finances and overstay risk, even if extensions exist in rare cases, because short-stay entries are not built around open-ended plans.
If you are entering a place where visitor entries are sensitive to overstays, like the UK Standard Visitor or the US visitor context, keep your narrative tight and avoid extra detail that you cannot prove.
Border Interview Scenarios and How to Answer Cleanly
Officers often ask questions that sound casual but are designed to test consistency.
Here are three common scenarios and what tends to work.
Scenario: “I’m deciding as I go.”
This answer can work in destinations with flexible tourism culture, but it is riskier under short-stay regimes like Schengen or Japan Temporary Visitor, where the officer wants a clear timeline.
A better version is: “We have a flexible itinerary inside the country, but we leave on 18 March from Rome,” and then you show the onward flight if requested.
Scenario: “I’ll leave by land.”
Land exits can be legitimate in places with easy land borders, like parts of mainland Europe or Southeast Asia, but airports often prefer a flight because it is easy to verify.
If you say “we exit by land” at a Schengen arrival, be ready to show a specific onward plan from the exit country, because the officer may ask how you avoid overstaying the Schengen clock.
If you say “we exit by land” in Thailand, be ready to show a specific onward booking from the next country or a transport proof that looks plausible, because the officer may treat vague land plans as weak proof.
Scenario: “I’m visiting friends.”
This can trigger a different question set in the UK Standard Visitor context or at US CBP, because officers may test where you will stay and how long.
If you are visiting friends in London, it helps if your onward date matches the duration you state, because it shows you are not using a visitor entry to drift into a long informal stay.
If you are visiting friends in New York, it helps if you can state the neighborhood, the length of stay, and your onward date without hesitation, because hesitation triggers deeper scrutiny.
A useful rule at any border is to answer the question asked, not the question you wish you were asked.
If the officer asks, “How long?” give a number and a date range. If they ask, “When do you leave?” give the onward date. If they ask, “Where are you going after?” give the destination city on the onward booking.
Arriving After a Long-Haul From Mumbai With a Tight Onward Connection Booked Separately
A tight, separately booked onward connection creates a specific risk at arrival and transfer points.
If you fly from Mumbai to a major hub and then connect to a Schengen destination on a different ticket, you may get questioned by a transfer desk before you reach the final flight, especially if the second airline treats you like a fresh check-in passenger.
If the transfer desk asks for onward proof, do not start by explaining the separate-ticket logic. Show the onward segment that proves you exit the Schengen Area within your planned stay window.
If immigration at the final destination asks, keep your narrative aligned to the onward date on that separate ticket, because separate-ticket itineraries often look improvised when the dates do not match your stated duration.
If your layover is tight, keep the onward proof open and ready before you join the transfer queue, because the time cost of searching email or logging into apps is what causes missed connections in these situations.
Uncommon Cases, Exceptions, and Risky Itineraries That Break “Normal” Advice
Once you understand how immigration weighs onward proof and why they sometimes ask even when it is not explicit, the next step is to tackle the itineraries and exceptions that break normal assumptions and create surprise checks.
Separate Tickets, Self-Transfer, and “Hidden” Visa Requirements at Transit
Separate tickets change your legal and operational position mid-journey.
On a single ticket, the airline chain usually owns the connection and can see the onward segment in one booking. On separate tickets, the second airline may treat you like a new departure passenger from the transit airport.
That is where “hidden” requirements appear.
A transit country can become relevant if you must leave the secure area to collect baggage, change terminals, or re-check luggage. Even if you personally call it “a connection,” the process can resemble entry, and staff may ask for proof that you can leave the transit country, too.
This is the self-transfer trap:
-
You planned for the final destination’s onward requirement.
-
You did not plan for the transit airport’s re-check requirement.
-
The second airline now wants proof of exit that fits both the transit reality and the destination rules.
If you are doing a self-transfer, we treat your itinerary as two separate journeys. That means you need onward proof that makes sense from the transit point, not just from your final destination.
A practical test before booking helps:
-
Will you have checked baggage?
-
Will you change terminals that require exiting airside?
-
Will your second airline require document verification at its own counter?
If any answer is “yes,” build a proof pack that can satisfy two checks: one at the first departure airport and one at the transit airport.
One more risk factor is timing. If your layover is tight and you know you may face a second check, avoid routes where a ten-minute document argument can erase your buffer.
Why You Might Be Treated as Entering the Transit Country
Some airports are structured so that certain connections require you to pass through immigration or security again, even when you never intend to “visit” that country.
When that happens, staff shift their thinking from “transit passenger” to “entry applicant for process purposes.”
This creates two common surprises:
First, the transit country may expect proof of onward travel that departs within a specific window. You can meet the final destination’s rule and still fail the transit logic if your onward is not presented in a way the transfer desk accepts.
Second, the transit staff may ask for evidence that you can board the next flight. If your onward proof is stored in an app that cannot load, you can lose the transfer even though you had everything in theory.
If your route includes a self-transfer, a low-cost carrier onward leg, or a change that forces a fresh check-in, assume you will be treated as entering the transit country operationally and prepare your onward proof accordingly.
Open-Jaw Exits, Land Borders, and Ferry Departures
Open-jaw travel is common. It is also easy to misunderstand at checkpoints.
The risk is not that open-jaw is “wrong.” The risk is that an agent cannot instantly see how you reach the departure point, and they decide your exit plan is not proven.
If you arrive in Rome and fly out of Paris, you may be fine. But you should expect the question: “How will you get to Paris?”
Your best answer is not a story. It is a clean, specific plan that matches dates.
If you plan to take a train or an internal flight, keep that segment available as backup. Even if nobody asks, having it reduces your stress and keeps your narrative consistent.
Land exits and ferry departures are where many travelers get stuck, because airlines prefer flight-based proof. A ferry confirmation can be valid proof of exit for immigration in some contexts, but airline staff at the first departure airport may not accept it as “onward travel” if it looks informal or hard to verify.
If your exit is not a flight, we treat it like a higher-friction scenario and tighten the proof:
-
Ensure the departure date is clearly visible.
-
Ensure your name is visible.
-
Ensure the route clearly crosses a border out of the country or out of the entry zone you are in.
This matters in places like Schengen short-stay travel. If you say you will exit Schengen by land, you may still need to show a plan that demonstrates you will stop accumulating Schengen days inside the 90/180 framework.
When “Exiting From a Different City/Country” Is Fine
It is usually fine when the logic is linear.
Arrive in Country A, travel within the region, depart from Country A’s other city, or depart from Country B, where you can legally enter.
It becomes fragile when your exit point assumes permissions you do not have.
If you are using a visitor entry that does not grant you access to the neighboring country, an onward flight departing from that neighboring country can be treated as weak proof because you cannot demonstrate that you can reach the departure airport legally.
So before you pick an onward departure point outside your arrival country, ask two questions:
-
Can you enter the exit country under your passport and your timeline?
-
If entry is conditional, can you prove that condition at the moment you are checked?
If you cannot answer both quickly, keep your onward flight departing from the same country you are entering, at least for the purpose of satisfying airline checks.
The Proof You’ll Need If Your Onward Leg Isn’t a Flight (And How to Keep It Airline-Acceptable)
When your exit is non-flight, the key is verification clarity.
Airline staff are trained on flights. They understand flight confirmations instantly. They may not understand a bus voucher or a ferry receipt that looks like a casual email.
If you use non-flight-proof, format becomes your friend.
Create a single-page document that shows:
-
Your full name
-
A fixed date and time
-
The departure location and arrival location
-
A reference number that looks official
-
A carrier or operator identity that can be checked
Even then, expect that some check-in agents will still prefer flight-based onward proof because it is easier to defend in their system notes.
Long-Stay Visas, Student/Work/Residence Entries: When Onward Proof Should Not Be Expected (But Sometimes Is)
Long-stay entries change the logic. You are not trying to prove you will leave within a short visitor stay window. You are proving your right to enter for a longer purpose.
Still, airline staff sometimes ask for onward proof on long-stay entries for two reasons.
First, they cannot confidently interpret the visa or permit at speed. Second, your itinerary shape looks like a visitor trip, such as a one-way ticket with limited supporting context.
When that happens, you should not argue about philosophy. You should anchor them to what they can verify.
If you have a residence permit or a long-stay visa, lead with that document and a clear statement of purpose, like “entering on a student visa for semester start” or “entering on a work permit.”
If they still want onward proof, you can satisfy the request without claiming you have a fixed return plan. Present an onward plan that fits a reasonable timeline, or present a document that shows your longer right to stay and your stable basis for eventual exit.
How to Explain “No Return Date Yet” in a Way That Agents Accept
Some entries genuinely do not have a return date at booking time.
The key is to replace “unknown” with “bounded.”
Instead of “we do not know,” use language like:
-
“We have the right to stay through this permit period, and we will book return travel closer to the end date.”
-
“We are entering a fixed program period that ends in June.”
Then be ready to show a document that proves the bounded period, such as an enrollment letter, date range, or a work contract start period, if asked.
You are not trying to win an argument. You are trying to give the agent something defensible to record.
Backup Documents That Support Legitimate Long-Stay Intent
Long-stay intent is easier to accept when one document supports another.
Useful backups include:
-
A residence card or approval notice that matches your passport name
-
A school enrollment document with a start date
-
A work authorization letter with the employer's name and start date
-
A tenancy or address registration document, if you have it
These do not replace onward proof in every situation, but they often reduce the urge for staff to demand a hard return flight on the spot.
Refugee Travel Documents, Emergency Passports, and Recently Renewed Passports
These documents often trigger extra checks because staff see them less often.
Refugee travel documents and emergency passports can create confusion about entry rights, especially when combined with visa-free programs or transit rules that assume a standard passport.
Recently renewed passports create a different issue: you may have visas or permits linked to an old passport number, or your frequent traveler profile might not match the new document.
This can lead to a slower check, and slow checks increase the odds that staff ask for more items, including onward proof, just to remove uncertainty.
If you travel with these documents, keep your onward proof extra clean and extra accessible. Also, keep any linking evidence ready, such as the old passport number reference in a visa sticker, if applicable.
Why Do These Create Extra Airline Checks?
Airline staff have to make a binary decision. Rare documents create hesitation. Hesitation triggers escalation.
If you notice the agent scanning the document repeatedly or calling a colleague, do not add complexity. Offer the simplest proof of exit you have and keep your answers tight.
How to Preempt Onward-Ticket Confusion With Consistent Documentation
Consistency is your shield.
Ensure your name format is consistent across:
-
Passport or travel document
-
Visa or permit
-
Flight reservations
If your travel document uses a different name field structure, you can still travel, but you should expect questions. Your best move is to keep your onward proof and your primary entry document visible and aligned.
Frequent Traveler Patterns That Trigger Extra Scrutiny
Frequent travel is not a problem by itself. The pattern can be.
Back-to-back visitor entries, long cumulative stays, and repeated one-way trips can look like de facto residence under a visitor category, especially in places that track entry history closely, like the UK and the US.
In Schengen, frequent entries can raise questions because the 90/180 rule is a math problem, and officers sometimes use onward proof as a quick proxy for whether you understand your permitted stay.
If you travel frequently on visitor entries, keep your onward plan tightly aligned to your declared stay and be ready for questions that confirm your timeline.
The “Looks Fake” Problem: When Perfectly Legal Proof Still Gets Rejected
Sometimes the issue is not legality. It is a presentation.
A legal, valid onward reservation can still be rejected at the counter if:
-
The PDF is blurry or low resolution
-
The passenger's name is missing on the first page
-
The date is not visible without scrolling
-
The route looks impossible from your arrival point
-
The document shows a different alphabet or unusual formatting that the agent cannot interpret quickly
We treat this as a design problem.
Before travel, check your onward proof like a stranger would:
-
Can you locate the date in two seconds?
-
Can you locate your name in two seconds?
-
Can you locate a reference in two seconds?
If any answer is “no,” rebuild the file format before you arrive at the airport.
A Practical Workflow to Choose the Safest Onward Option
Let's go through a practical workflow that helps you choose the safest onward option without paying for more than you need. 👉 Order your dummy ticket today
Step 1 — Identify Where the Check Will Happen on Your Route (Counter, Gate, Transit Desk, Arrival)
Start by mapping checkpoints for your destination country, not just your flight ticket.
Checkpoint A is check-in. If online check-in fails, the airline is routing you to a manual immigration checks workflow for your route.
Checkpoint B is a transit. If you self-transfer on separate tickets, a transfer desk can ask for onward travel proof as if you are starting a new journey from that airport.
Checkpoint C is the gate. Carriers add gate document verification on routes where many countries enforce strict entry screening for short-stay visitors.
Checkpoint D at the arrival. At passport control, immigration officers may ask for exit proof even if your airline already cleared you, especially on one-way visitor patterns.
Now add one specific label to each checkpoint: likely, possible, or unlikely.
If you are entering the Schengen Area for a short stay, label D as possible when your trip length sits close to the 90/180 limit.
If you are arriving in the UK on a Standard Visitor plan, label D as possible when your timeline and funds are not instantly obvious.
If you are entering the US on ESTA with a US passport holder traveling alongside you, label A as likely for the non-US traveler on a one-way, because staff often ask different questions per passport and admission type.
If you are transiting through a hub with a tight self-transfer, label B as likely because a missed connection can force a re-check and new questions.
This checkpoint map drives every decision you make next.
Step 2 — Decide the “Strength Level” of Proof You Need
Now choose the strength level based on what staff must verify in seconds.
We use three strength levels that align with how airlines and immigration officials evaluate risk.
Level 1 fits clean round-trips for short stays. It works when your return flight already shows departure and arrival airports clearly, and your dates sit inside the stay window.
Level 2 fits one-way visitor entries, open-jaw exits, and routes where countries require proof of onward departure in practice. Use it when you want a valid onward ticket that reads cleanly at the counter and still makes sense at arrival airports.
Level 3 fits high-friction routes. This includes separate-ticket transfers, long visitor stays, and itineraries where the gate can re-check you after the counter cleared you. Level 3 is a proof pack built for airline policy plus immigration rules.
Your target is not “strongest proof.” Your target is “strong enough for the earliest strict checkpoint.”
Step 3 — Align the Onward Date With Your Permitted Stay and Your Story
The fastest way to trigger extra questioning is a timeline that contradicts itself.
Start by locking your permitted stay for the visa class or admission type you are using. Then set an exit date that lands inside it, not on the edge.
For Schengen short-stay travel, avoid an onward date that conflicts with your declared days because officers often use the exit date as a quick sanity check against the 90/180 math.
For UK Standard Visitor entries, a clean exit date supports credibility because UK questioning often shifts toward intent when plans sound open-ended.
For US visitor admissions on ESTA, a fixed departure date helps reduce follow-ups when you arrive on a one-way plane ticket.
Now write the single sentence you will say at the counter and at passport control.
Example: “Tourism for nine nights, then onward journey to Athens on 18 March.”
Compare that sentence to the date on your onward flight ticket. If they do not match, your story becomes the problem, not your paperwork.
Also, align the date with document boundaries. If your visa expires soon after entry, do not place your onward date beyond that line and expect staff to “trust the plan.”
Step 4 — Build the “Proof Pack” and Test It as an Airline Agent Would
This step is about what a staff member can validate quickly.
Your Layer One should be a verified flight reservation that shows your name, a flight number, the date, and a PNR code on the first page.
Make sure it reads like a real flight reservation, not a cropped image with missing identity details.
If you are using a temporary reservation, download it to your phone as an offline PDF so it still works when airport Wi-Fi fails.
Your Layer Two should explain only what looks unusual to staff.
If your exit flight departs from a different city, add the second segment that gets you there, or a simple itinerary view that makes the connection obvious.
If you are on separate tickets, include the second booking confirmation so a transfer desk can see your next destination without guessing.
Now test the pack like the person who will stop you.
Set a ten-second timer. Open the file offline. Zoom once. Point to your name, date, and reference.
If that takes longer than ten seconds at home, it will fail at a crowded gate.
Do one more test for presentation risk. A document can be legal and still look wrong if the date or passenger name is buried. That is how a verifiable reservation turns into an argument.
Step 5 — Day-of-Travel Protocol
Day-of-travel success is about sequence and consistency under pressure.
If your checkpoint map says the counter is likely, open your proof before you reach the desk and keep the screen ready.
Answer questions with dates, not vague language. This matters on routes where many countries screen for overstays and where a casual “we will decide later” can trigger follow-ups.
Show Layer One first. Let the agent read it without narration. If you talk too much, you create new contradictions for them to record.
If the agent says they need a “real” ticket, ask what they mean. Some agents mean a fully paid ticket. Some mean a document that looks like a real airline ticket with a reference they can note.
If you prefer maximum simplicity, a refundable ticket can be a clean option for some travelers, but check cancellation terms so you understand the upfront cost.
If you use a dummy ticket or a temporary flight reservation, keep it readable and consistent with your declared stay so it functions as an onward travel ticket at the counter.
If staff escalate to a supervisor, keep the same sentence you practiced. Do not change the purpose, the length, or the exit date after someone has typed notes into your booking.
If you are asked again at the gate, the same rule applies. Show the same document, with the same dates, and do not introduce new details.
Try dummyflights.com For A Dummy Ticket With A Verifiable PNR
If you need onward ticket services for a time-sensitive check-in, dummyflights.com can issue a verified flight reservation with a PNR code and PDF, and you can get your ticket instantly for a small fee with transparent pricing at $15 (around ₹1,300). It supports unlimited date changes, accepts credit cards, and is trusted worldwide for visa applications.
Visa Applicant Mistake Checklist
Use this checklist when your visa approval comes through, and you are finalizing your itinerary.
You chose an exit that departs from a country you cannot enter, so your onward travel proof does not demonstrate a workable exit.
Your flight itinerary shows a departure date beyond your permitted stay, which raises the risk of a denied entry decision at arrival.
Your document hides the passenger name or booking reference, so the agent cannot record it as a reservation in their notes.
Your story says “one week,” but your exit is three weeks later, which triggers extra questions from immigration officers.
You rely on email or a login screen to access the file, which fails at airports with poor connectivity.
You planned a self-transfer and left no time for document checks, which turned a minor delay into a missed onward flight ticket.
You picked an exit method like a bus ticket for a cross-border plane, but did not prepare a format that airline staff would accept quickly at check-in.
You switched your data at the te last minute and forgot to replace the offline copy, which makes your proof pack contradict itself.
If you build your proof around the checkpoint map and test it as a stranger would, you can keep flexible schedules while still presenting fixed plans that clear both airlines and immigration officials.
As you finalize your visa documentation, remember that a dummy ticket acts as reliable proof of onward travel, accepted by many embassies worldwide. Understanding what is a dummy ticket can clarify its role in your application. It's essentially a temporary flight reservation that provides verifiable details without the need for full payment. This tool is invaluable for demonstrating travel intent, especially when real tickets are impractical due to uncertain approval timelines. Opt for services offering PNR verification to ensure authenticity. Key tips include aligning dates with your visa validity, using accurate passenger information, and downloading the PDF promptly. Avoid common pitfalls like mismatched names or unrealistic routes. Embassies appreciate clear, professional submissions that show compliance with exit requirements. With unlimited changes available, adjust as needed without fees. This reliability builds confidence in your application, reducing rejection risks. Travelers often pair it with hotel bookings for a complete package. For best results, consult recent guidelines and prepare backups. If questions arise, our FAQ covers common scenarios. Embrace this strategy for a seamless process—your approved visa awaits. Take the next step by securing your dummy ticket today and focus on enjoying your upcoming adventure.
Secure Your Onward Ticket For Immigration Before It Becomes a Boarding Problem
If you are flying into Schengen, the UK, the US on ESTA, or a short-stay hub like Singapore or Japan, treat onward proof as a checkpoint tool, not a paperwork afterthought. We built the decision tree and workflow so you can match your onward plan to your route, your permitted stay, and the place you are most likely to be challenged.
You can now choose proof strength without overbuying, keep your dates aligned, and show the right document fast at check-in, transit desks, or passport control. If your trip is coming up soon, run your itinerary through the checkpoint map once and save your onward proof offline.
Why Travelers Trust dummyflights.com
dummyflights.com has been helping travelers since 2019, providing specialized dummy ticket reservations for visa applications and immigration checks.
Over 50,000+ visa applicants have been supported with our verifiable PNR codes and instant PDF deliveries.
We offer 24/7 customer support to handle any queries or changes promptly.
Secure online payments ensure your data is protected, and our focus on dummy ticket services demonstrates our niche expertise.
dummyflights.com is a registered business with a dedicated team, ensuring no fake or automated tickets—only reliable, professional solutions.
More Resources
Related Guides
About the Author
Visa Expert Team — With over 10 years of combined experience in travel documentation and visa assistance, our editorial team specializes in creating verifiable flight and hotel itineraries for visa applications. We have supported travelers across 50+ countries by aligning documentation with embassy and immigration standards.
Editorial Standards & Experience
Our content is based on real-world visa application cases, airline reservation systems (GDS), and ongoing monitoring of embassy and consular documentation requirements. Articles are reviewed and updated regularly to reflect current practices.
Trusted & Official References
Important Disclaimer
While our flight and hotel reservations are created to meet common embassy requirements, acceptance is not guaranteed and may vary by country, nationality, or consulate. Applicants should always verify documentation rules with the relevant embassy or official government website prior to submission.
Related Posts
Etihad Airways Dummy Ticket for Visa 2026: Booking, PNR Verification & India Guide
14 Jul, 26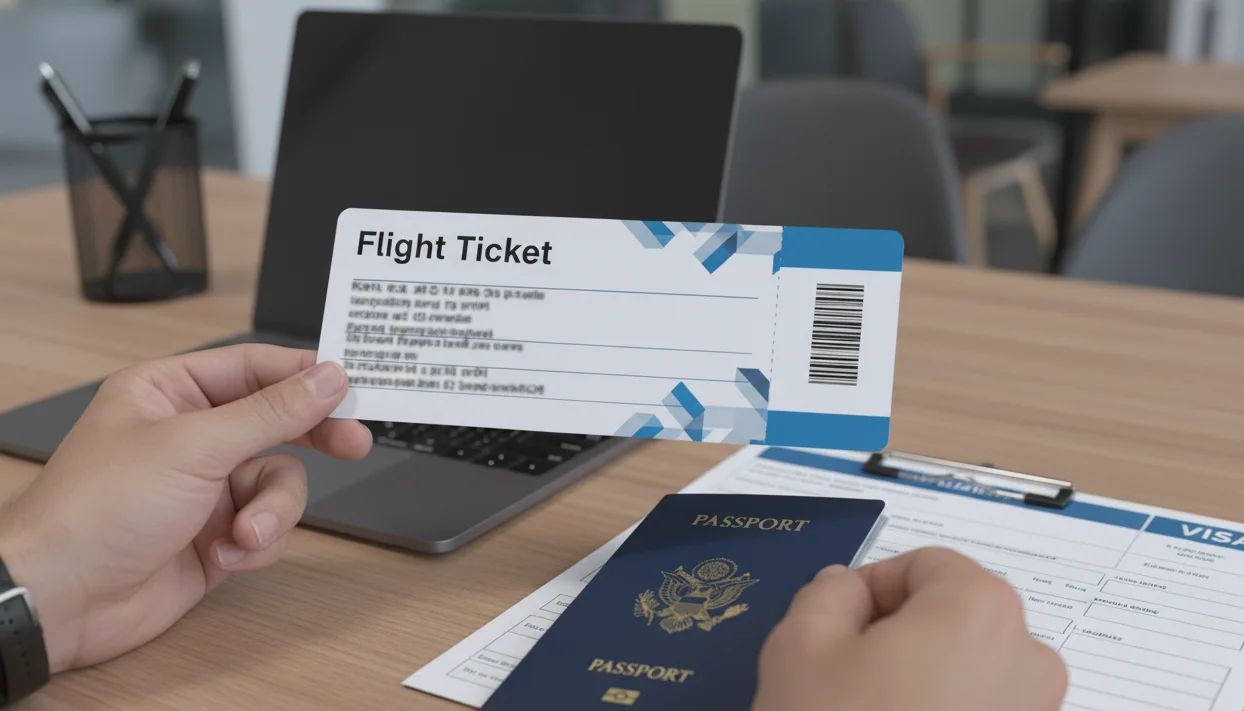
Long-Validity Dummy Ticket for Visa 2026: PNR, 14-Day Holds, Reissues & India Guide
13 Jul, 26
Dummy Ticket Validity for Visa Applications 2026: Hours, Expiry, Verification & Reissues
13 Jul, 26
Air India Dummy Ticket for Visa 2026: Fare Lock, PNR Verification & India Guide
13 Jul, 26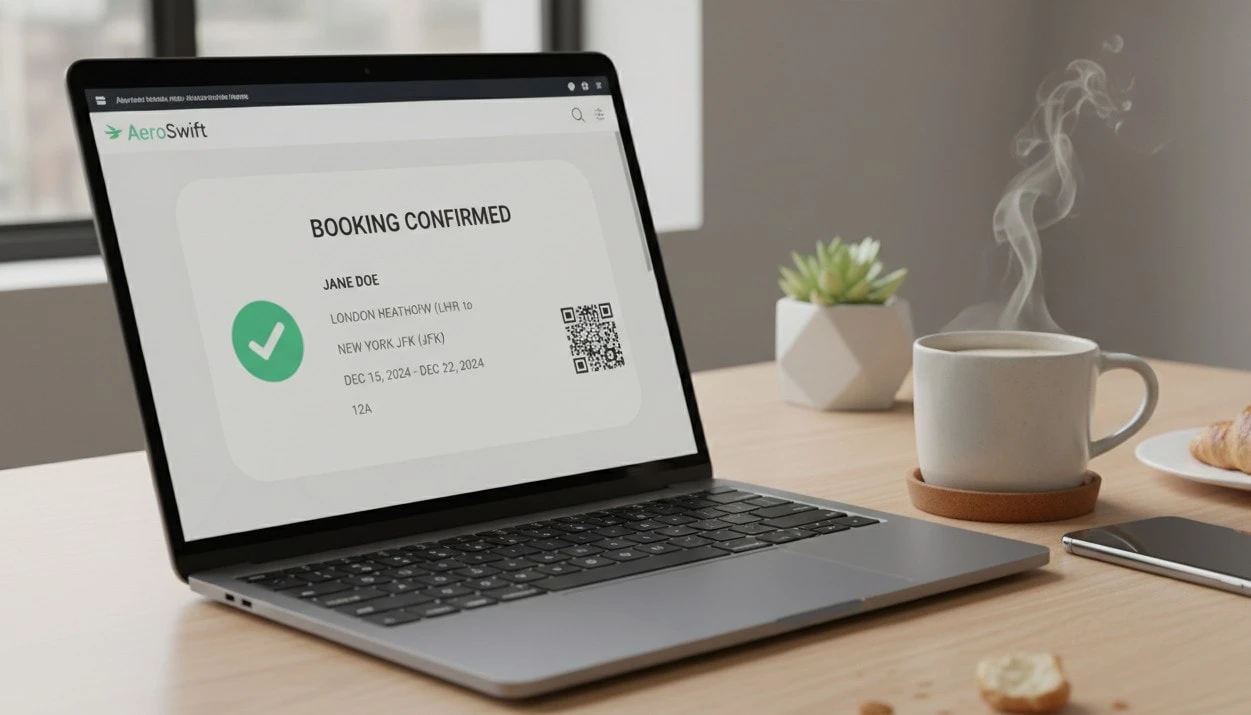
Best Dummy Ticket Websites in India 2026: Verified Provider Comparison
13 Jul, 26
Qatar Airways Dummy Ticket for Visa 2026: Hold, PNR Verification & India Guide
13 Jul, 26
Emirates Dummy Ticket for Visa 2026: Hold My Fare, PNR Verification & India Guide
13 Jul, 26
IndiGo Dummy Ticket for Visa 2026: Fare Hold, PNR Verification & India Guide
13 Jul, 26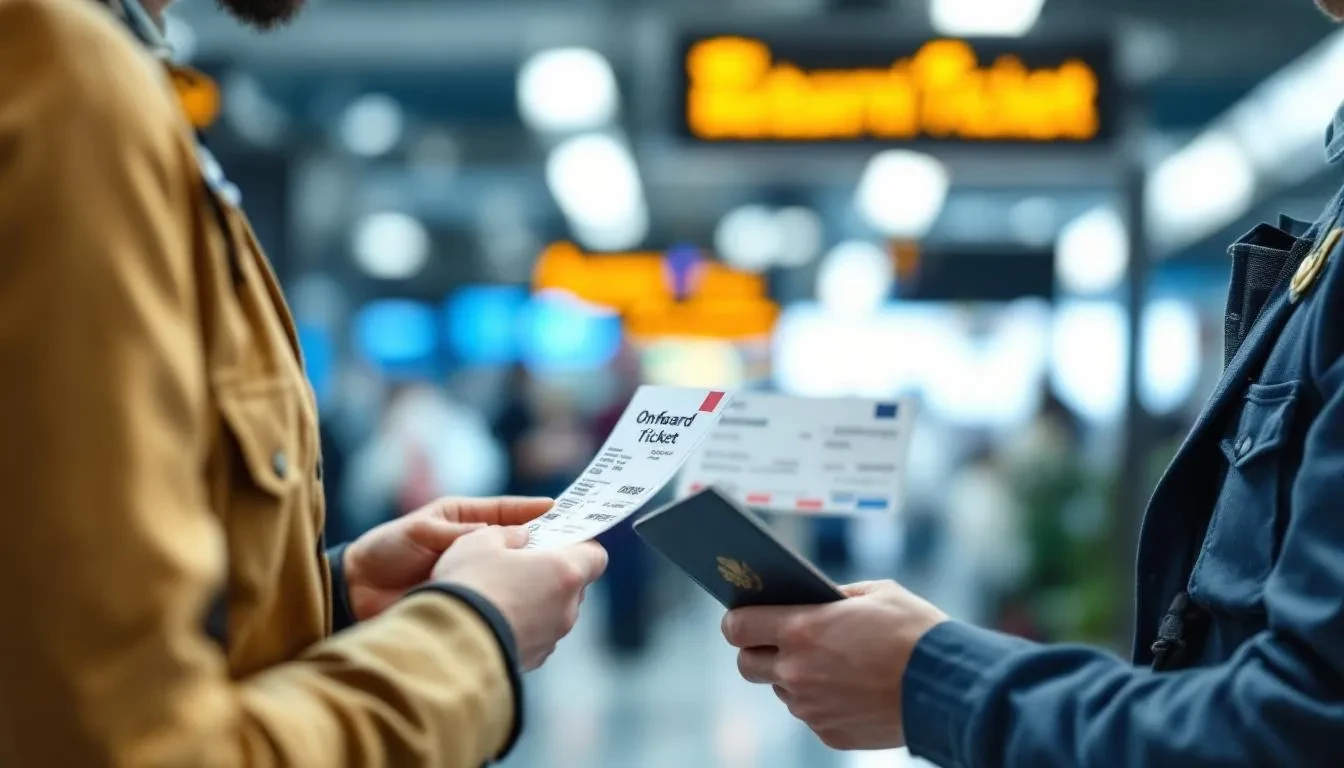
Dummy Onward Ticket Immigration: Can You Really Use One at the Border? (2026)
12 Jul, 26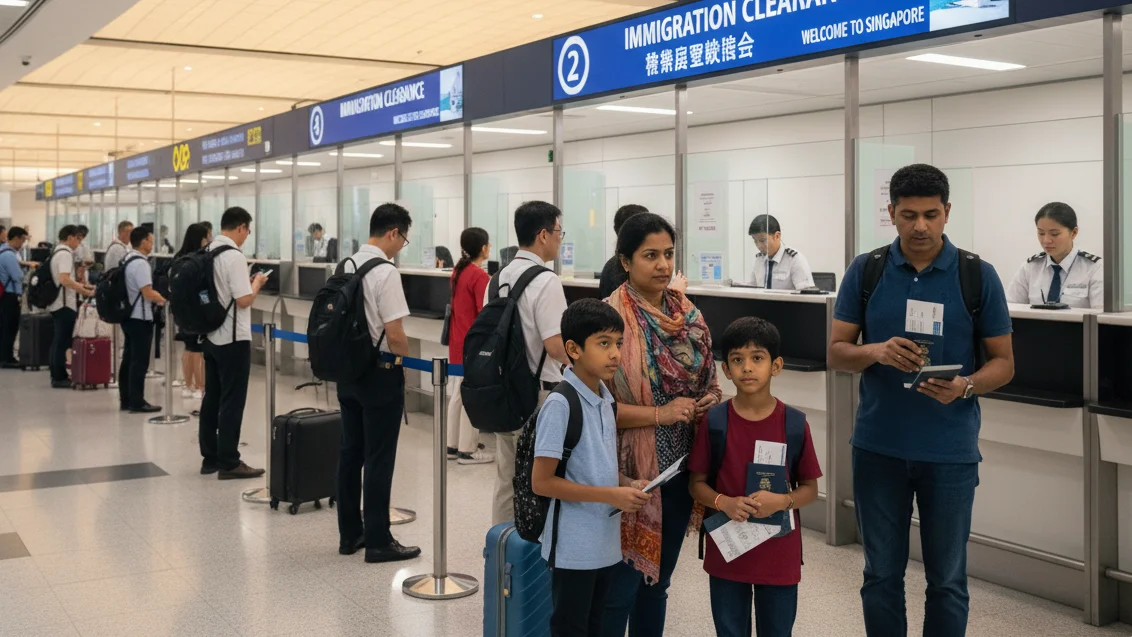
Do You Actually Need an Onward Ticket for Singapore Visitor Visa? (2026 Guide)
12 Jul, 26