Japan Business Visa Documents Checklist: Dummy Ticket For Visa, Letters & Funds

How Japan Reviews Business Visa Files: Dates, Sponsors & Proof Logic
Japan business visa files get read like a timeline. Your flight itinerary dates, your employer letter, and your meeting schedule have to line up, down to the weekday. One stray return date or vague “business meetings” line is enough to trigger extra questions or a request to resubmit. For a smooth process, start with a reliable dummy ticket that allows flexibility and quick updates.
In this checklist, we’ll build a clean, 2026-ready document pack that tells one story. You’ll learn how to choose a flight reservation that matches your flexibility, write an employer letter that backs the trip purpose and who pays, shape a day-by-day meeting schedule that feels realistic, and show funds in a way that fits the sponsor. If your Japan business visa dates shift, keep your itinerary aligned with a dummy ticket booking that supports quick, clean updates. For more insights, check our blogs on visa preparations and our about us page for service details.
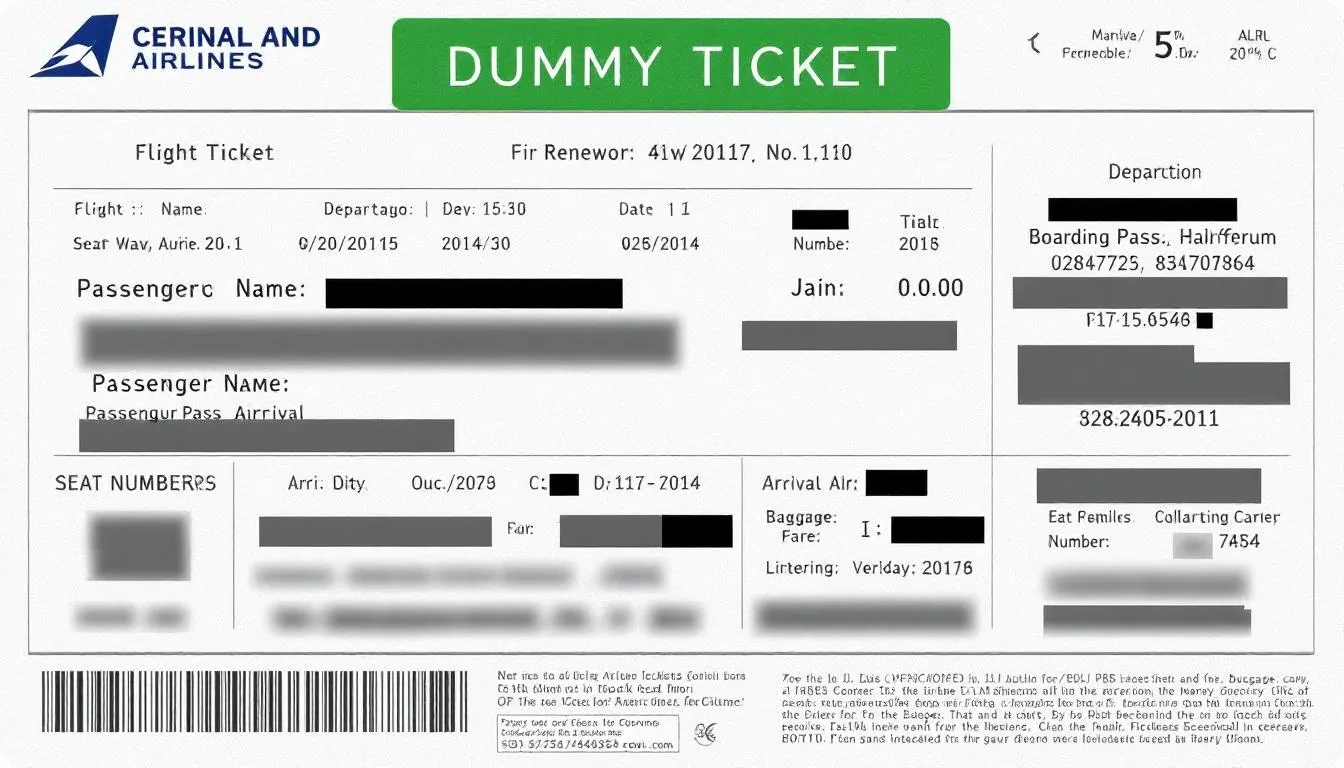
Dummy ticket for Japan business visa is essential for applicants in 2026—avoid visa rejections and unnecessary airfare costs by submitting a verifiable reservation instead of purchasing a full ticket upfront. 🌏 It clearly proves your entry and exit intent, aligning with Japan business visa documentation rules without financial risk.
A professional, PNR-verified dummy ticket for Japan business visa helps streamline your application, ensuring consistency with invitation letters, company documents, and proof of funds. Pro Tip: Always match your flight dates, passport name, and business schedule exactly to avoid delays or additional checks. 👉 Order yours now and apply with confidence.
Last updated: January 2026 — Verified against latest Japan business visa guidelines, MOFA practices, IATA standards, and recent applicant feedback.
When preparing for a Japan business visa, early-stage visa planning is crucial to avoid costly mistakes and delays. One of the first steps involves securing proof of onward travel, such as a temporary flight itinerary, which serves as a key document in your application. This is where a dummy airline ticket generator with PNR becomes invaluable. These tools allow you to create verifiable reservations without committing to actual purchases, providing the flexibility needed during the uncertain phases of visa processing. By generating a dummy ticket for visa, you can align your travel dates with your meeting schedule and employer letters seamlessly, ensuring consistency across all documents. This approach minimizes financial risk, as you avoid booking refundable flights that might incur high fees if plans change. Moreover, it helps in demonstrating a clear travel intent to the embassy, boosting your application's credibility. Start by selecting a reputable generator that offers instant PDF delivery and unlimited changes, then integrate it into your checklist. Remember to verify the PNR on airline websites for authenticity. This proactive step not only streamlines your preparation but also gives you peace of mind, knowing your dummy ticket for visa is compliant and ready for submission. Ready to simplify your visa journey? Explore reliable options to generate your itinerary today.
Your Application Needs One Story, Not Seven Separate Documents

A Japan business visa file works best when every page supports the same trip story. Before you chase signatures and PDFs, we lock that story so your itinerary, letters, schedule, and funds all point in one direction.
The Three-Layer Packet That Japan Visas Usually “Read” As
Think of your packet as three layers that must agree on the same basics: why you’re going, when you’re going, who pays, and where you’ll be each day. In practice, the file gets scanned for a few fast checks: the trip window, the meeting city, and the sponsor. If those three items change from document to document, your file stops feeling “business” and starts feeling “unclear.” We make those checks effortless by locking one set of dates, cities, and sponsor wording.
Layer 1 is you. This is where your identity details and employment identity appear in forms and supporting records. Keep your name format, job title, and contact details consistent everywhere.
Layer 2 is your employer. This is where intent and accountability get anchored. The employer letter should explain the business purpose in plain terms and confirm that you will return to your role after the trip. If your employer says the trip is five working days but your itinerary and Schedule of Stay stretch to nine, that mismatch does more damage than a missing stamp.
Layer 3 is the Japan-side host. This is where your meetings become real. Invitation-style documents and a structured schedule show that someone in Japan expects you and can be contacted if needed. If your schedule lists meetings in Tokyo while the invitation references Osaka, you’ve created an unnecessary question.
Single-Entry vs Multiple-Entry Changes What “Strong” Looks Like
A single-entry request usually reads like a one-time assignment with clear start and end points. A multiple-entry request reads like an ongoing business relationship. That difference should change how you build your packet.
For a single-entry request, strength often comes from tight alignment:
-
One clear purpose that matches in every document
-
A day-by-day schedule, not a vague “meetings” block
-
A flight plan that cleanly frames the trip window
For a multiple-entry request, strength comes from repeatable logic:
-
The employer's letter explains why future visits are likely
-
The Japan-side relationship looks established, not newly invented
-
Your role clearly requires recurring in-person contact
The practical trap is asking for multiple entries while submitting a “single-trip only” story. A two-day schedule with one meeting rarely supports an open-ended travel pattern, even if your finances look strong.
Decide The Payer First, Because It Dictates Everything Else
Before you finalize your itinerary or letters, we will decide who pays. This is the backbone of consistency. When payer language changes from page to page, it creates the impression that nobody is fully responsible for the trip.
Three payer setups show up most often:
-
You pay personally and later get reimbursed
-
Your employer pays directly (company card, invoice, or travel desk)
-
The Japan-side host covers some or all expenses
Each setup changes what your documents must say.
If you are self-funded, your funds must comfortably cover the trip window your itinerary and schedule describe. Your employer letter should explain why the trip is necessary, but it should not imply the company is paying if it is not.
If your employer pays, the employer letter should explicitly state the cost categories it covers. Your personal funds can still help, but the story should not quietly turn into “we pay nothing, but you pay everything.” If reimbursement is the real plan, see it as employer-funded, and make that clear.
If the Japan-side host pays, the host documents must clearly show what is covered, and your employer's letter must not contradict it. A common mismatch is an employer letter stating “all expenses borne by the company,” while the host paperwork positions the host as the guarantor. That is a sponsorship conflict.
Timing Rules That Prevent “Looks Rushed” Red Flags
Most problems are not about being “late.” They’re about timing, which looks careless. Your issue dates should reflect a real planning process.
Separate what should be current from what should be stable:
-
Current: employer letter, host letters, schedule pages with exact dates.
-
Stable: core employment proof, identity records, and your standard banking history.
Then keep the timeline logical. What hurts is when one document looks planned, and another looks scrambled.
Two timing failures show up again and again:
-
The schedule lists meetings that start before your flight arrival date.
-
A letter is dated after the stated travel start, which makes the trip feel unmanaged.
If dates change, don’t reissue everything blindly. Update only what contains date logic. That usually includes the itinerary, the Schedule of Stay, and any letter that states exact travel dates. The goal is to avoid leaving “old dates” hiding in a sentence on page two.
Build The Packet In The Only Order That Avoids Contradictions
This build order keeps Japan's business files clean and consistent, especially when your dates might shift.
Step 1: Lock your trip window in plain language. Pick the first and last day you will be in Japan and make sure it matches realistic workdays.
Step 2: Draft a skeleton Schedule of Stay before letters. List each day with a city and a purpose, even if meeting times are still approximate.
Step 3: Choose your flight plan around the schedule. Your arrival should give you breathing room before the first meeting. Your return should not cut through the final business day.
Step 4: Build the employer letter to echo the schedule. The purpose line, the dates, and who pays must match the Schedule of Stay and itinerary exactly.
Step 5: Align the Japan-side documents to the same story. Meeting city, contact points, and company details should match what you’ve already locked.
Step 6: Add funds proof that fits the payer's story. If the employer pays, your statements should look stable, not staged. If you pay, your balances should match the trip length you are claiming.
Step 7: Run a consistency sweep with a ruthless checklist:
-
Dates match across itinerary, schedule, and letters.
-
Meeting city matches the airports you use.
-
Job title matches across forms and letters.
-
Payer language is identical everywhere it appears.
-
Contact details are specific and reachable.
-
Spellings match what’s on your passport, including middle names and initials.
Once that story is locked, the next decision is your flight itinerary, because it’s the first place where date mismatches show up.
Your Flight Itinerary Is A Credibility Test, Not A Formality

Your Japan business visa file can look perfect on paper and still get slowed down if the flight itinerary feels off. Here, we focus on making your route, dates, and reservation format support the exact trip you’re claiming.
What The Japanese Embassy Usually Expects From Flight Proof
Japan's business visa screening is very data-driven. The itinerary is one of the fastest ways for a reviewer to validate whether your trip is a real business plan or a loose idea.
In practical terms, your flight proof needs to do three things well:
-
Frame your trip window clearly (entry and exit dates that match your Schedule of Stay and letters)
-
Place you in the correct business city at the correct time (arrival timing that makes sense for your first meeting)
-
Looks like a normal traveler’s routing (no strange detours that don’t serve the business plan)
What matters most is not “how fancy” the document looks. It’s whether the itinerary makes your meeting schedule believable.
If your invitation and schedule are centered on Tokyo, your flight plan should not quietly route you into a different region unless you’ve explained why. If the meetings start on Tuesday afternoon, landing on Tuesday evening is a problem, even if it’s only a few hours. Reviewers notice that disconnect because it changes the entire story of day one.
A strong itinerary also avoids accidental contradictions with time zones. Japan runs on JST, and meeting times are usually assumed local. If your itinerary lands the morning after your schedule says you’ll be in a 10:00 AM meeting, you’ve created a preventable question.
Choose The Right Dummy Ticket Format For Your Case
Not every trip needs the same kind of reservation. Your best format depends on how stable your dates are, how your company handles approvals, and how tight your meeting calendar is.
Use these decision points to choose cleanly.
Start with your date stability:
-
Dates are locked, and meetings are fixed: a straightforward point-to-point itinerary works best.
-
Dates might shift by a day or two: you want a reservation style that allows easy date movement without rewriting your entire packet.
-
Dates are still being negotiated: keep your itinerary aligned to a realistic window, but avoid showing a route that depends on a fragile schedule.
Then check who controls the travel decisions:
-
You control booking: the itinerary should still look business-tight, but you can keep flexibility.
-
Your employer controls booking: your itinerary should match corporate travel logic. That often means standard carriers and practical connections.
-
The host is coordinating timing: your itinerary should reflect the meeting structure they’ve provided, not a random personal preference.
Now match the itinerary to the shape of the trip:
-
Single-city trip: fly into the main business airport for that city, and keep ground travel realistic.
-
Two-city trip: build in transit time. A morning meeting in one city and an afternoon meeting in another is hard to defend.
-
Conference plus meetings: avoid squeezing everything into one day just to shorten the trip window.
A simple way to sanity-check your format is to ask one question: If a stranger reads only your itinerary and your Schedule of Stay, do they describe the same trip? If the answer is “mostly,” tighten it. “Mostly” is where follow-up requests come from.
The “Looks Fake” Patterns Even When Your Dates Are Fine
You can choose the correct dates and still create doubt with the wrong shape of itinerary. Japanese business travel has a normal rhythm, and your route should fit that rhythm.
Here are patterns that often trigger questions, even if the documents look clean:
-
Arrival that leaves no time for the first obligation
Landing late afternoon, then claiming an early evening meeting across the city. -
Overly complex routing for a short business stay
Two or three connections when a direct or one-stop is the common travel behavior. -
Airport choices that don’t match the meeting city
Claiming Tokyo meetings, but arriving at an airport that implies you’ll spend half a day repositioning. -
Departure timing that conflicts with the last business day
A morning return flight on the same day your schedule lists a full-day meeting. -
A “tour loop” vibe inside a business file
Multiple internal hops that look like sightseeing movement rather than business necessity. -
Too-tight layovers
Connections that are technically possible but unlikely for a working professional traveling with documents, devices, and meeting pressure. -
Return route that doesn’t make sense
Flying out from a different city than your scheduled end, with no listed reason for the repositioning.
If your trip genuinely requires an unusual routing, we don’t hide it. We explain it. But the explanation should be short and factual. One line in the schedule can solve a lot, for example: “Same-day transit to Osaka for supplier visit on Day 2.” That single line makes the airport and timing choices coherent.
Flexibility Without Chaos: How To Keep Your Options Open
You can keep flexibility and still look organized. The key is to avoid the “multiple versions” problem, where every document tells a slightly different story because your plans are moving.
Here, we keep flexibility in the itinerary while locking consistency across the packet.
First, build a buffer into the itinerary the smart way:
-
Arrive with a cushion before the first key meeting
If your first meeting is Day 2 morning, arriving Day 1 afternoon looks planned and professional. -
Don’t schedule a return that cuts through Day 1 or the last meeting day
A return flight that forces you to “miss” your own schedule creates unnecessary doubt.
Second, manage itinerary versions like a pro:
-
Keep one “current” itinerary PDF that matches the final dates.
-
If dates change, replace the itinerary file everywhere you store it, not just in one folder.
-
Recheck any letter that mentions the exact travel dates. Even one sentence can conflict.
Third, don’t let your itinerary become a second schedule.
A flight itinerary should frame the trip. It should not try to do the job of your meeting plan. When applicants attempt to “prove” too much through flight segments, the itinerary starts looking engineered.
Keep it simple:
-
One arrival into the main business city (or the first meeting city)
-
One departure from the last business city
-
Internal travel only if it is essential to the business purpose and clearly supported by the Schedule of Stay
If your employer approvals are still in motion, your itinerary can still be consistent. You simply align the itinerary to a realistic travel window that matches the meeting blocks you can defend, and you avoid showing a route that requires perfect timing.
Verifiability Reality: What Gets Checked And What Gets Questioned
Japan visa submission is not a guessing game. Reviewers look for signals that a document is real, readable, and consistent with the rest of the file.
For your flight itinerary, the most common scrutiny points are simple:
-
Passenger name formatting
Your name should match your passport order and spelling. If your passport includes a middle name, don’t let the itinerary drop it on one page and include it on another. -
Travel dates and day alignment
Your dates should match the employer letter and the Schedule of Stay. If your schedule says Day 1 is “Arrival and company briefing,” your itinerary must land on that Day 1. -
Route logic
Airports and connections should fit the business city and the time you need to be there. -
Document clarity
A clean PDF matters because the file is often scanned, printed, and reviewed quickly. If details are faint or cropped, it slows everything down.
What gets questioned most often is not the existence of a reservation. It’s the logic around it. A believable business trip looks like it was planned with meetings in mind, not stitched together from unrelated flight options.
A practical checkpoint we use is the “two-document test”:
Put these side by side:
-
Your itinerary
-
Your Schedule of Stay
Then verify:
-
The arrival day matches Day 1.
-
The city on Day 1 matches the arrival airport’s reality.
-
The last meeting day has enough space before departure.
-
Any internal travel day appears in both documents.
If you pass that test, your itinerary stops being a risk area and becomes a support document that reinforces everything else.
When You Need A Verifiable Reservation Fast
Sometimes you need a reservation that stays coherent while your meeting dates settle, or while your company finalizes approvals. In that case, using a service that provides an instantly verifiable reservation, a PNR with a PDF, and unlimited date changes can help you keep your itinerary aligned with the rest of your Japan business visa packet.
dummyflights.com offers transparent pricing at $15 (about ₹1,300), supports credit card payments, and is used worldwide for visa submissions, which can be useful when you want one clean reservation file that can be updated without rewriting the rest of your documents.
Once your itinerary is stable and aligned, the next place we tighten the story is your employer letter, because it’s where purpose, role, dates, and payment responsibility must be stated with zero ambiguity.
Your Employer Letter Done Right: It Should Match Your Role, Your Calendar, And The Money Trail

Your employer letter is where the Japan business visa file either snaps into place or starts drifting. Here, we focus on making that letter read like a real corporate trip, backed by clean dates, clear purpose, and one consistent funding story.
Employer Letter vs Travel Order vs Certificate Of Employment
These documents get mixed up all the time, and that’s exactly how contradictions sneak in.
An employer letter is a narrative document. It explains why you’re traveling, what you’ll do, when you’ll travel, and who pays. It should match your Japan meeting schedule and your flight itinerary window, but it should not read like a personal cover letter.
A travel order (or travel authorization) is an internal approval record. If your company issues one, it can add credibility because it shows the trip is sanctioned. But it often uses internal shorthand like cost centers, project codes, or vague “business travel” lines. If the travel order conflicts with your employer's letter dates, it becomes a liability, not a strength.
A certificate of employment is identity proof. It should confirm your job title, start date, and employment status. It should not introduce new trip details. When companies try to “save time” by combining the certificate of employment with trip details, they often create messy wording like “employed as Sales Manager and traveling for meetings in Japan.” That hybrid format tends to produce mismatched dates when plans shift.
A clean approach is simple:
-
Use the employer letter for the trip purpose, dates, and payer.
-
Use the certificate of employment for the role and tenure.
-
Use the travel order only if it matches and looks like a normal corporate approval document.
If you only submit one employer document, pick the employer letter. For Japan business visas, it does the most work.
The Content Checklist That Makes The Letter Visa-Ready
A strong employer letter is short, specific, and consistent. It does not try to impress. It tries to remove doubt.
These are the content blocks that matter most.
1) Purpose That Sounds Like A Real Business Objective
Avoid broad terms that invite questions, like “business meetings” without context. Give a concrete, normal corporate objective. For example:
-
Project kickoff and requirements review with the Japan partner team.
-
Contract negotiation meetings and quarterly performance review.
-
Supplier assessment and operational alignment meetings.
-
Conference attendance plus scheduled client follow-ups.
One or two purpose lines are enough. The key is that the purpose should match the host's invitation and your Schedule of Stay phrasing.
2) Exact Trip Dates That Match The Flight Window
Use dates, not “one week” or “7 days.” Japan business visa screening often becomes a date-matching exercise across documents. If your letter says March 10 to March 15, your itinerary cannot show a March 09 departure and a March 16 return without a reason.
A safe pattern is to state the in-Japan dates clearly, then allow the flight to frame them:
-
“The employee will travel to Japan from [date] to [date] for scheduled business meetings.”
If your company insists on listing “departure from home country,” confirm those dates match your itinerary version exactly.
3) Your Role And Why You Are The Right Person
This is not a biography. It’s one line that connects your title to the purpose.
-
“As [role], the employee will lead technical discussions with the Japan team.”
-
“As [role], the employee will finalize commercial terms and implementation timeline.”
This line matters because it explains why the trip is necessary, not optional.
4) A Clear Payer Statement That Matches Funds Proof
Pick one payer story and write it cleanly.
Employer-funded example lines:
-
“All travel expenses will be borne by the company, including flights, local transport, and accommodation.”
-
“The company will cover round-trip airfare and daily travel expenses during the trip.”
Self-funded with reimbursement example lines:
-
“The employee will initially cover travel expenses and will be reimbursed by the company as per internal policy.”
Host-covered example line:
-
“Certain expenses will be covered by the inviting organization in Japan as stated in their documents.”
The key is not which line you use. The key is that the same payer logic must appear everywhere the payer is mentioned.
5) Leave Approval And Return Assurance Without Overwriting
A simple sentence works best:
-
“The employee has been granted leave for the above period and will return to their position after the trip.”
Avoid dramatic language about “strong ties” or “guaranteed return.” Overly emotional phrasing reads unnatural in corporate letters.
6) Employer Contact Details That Can Be Verified
Include a phone number and email that belong to the company domain when possible. If your company uses a shared HR mailbox, that’s fine. It just needs to look real and reachable.
Before you finalize, run a “three-document alignment” check using only these items:
-
Purpose wording
-
Travel dates
-
Payer statement
If those three match your itinerary and Schedule of Stay, the letter is doing its job.
Signatures, Designations, And Contactability
Japan business visa packets can get delayed over small credibility details that are easy to fix upfront.
The signatory should make sense for your organization. HR is common. A direct manager is also common. A random executive title with no connection to your travel purpose can raise questions, especially if contact details are generic.
Make sure the signatory block includes:
-
Full name
-
Title
-
Company name
-
Signature
-
Date
-
Contact details
Now watch for two silent problems.
Problem 1: Title Drift
If your employment records say “Business Development Executive” but the employer letter calls you “Business Development Manager,” that looks like a different person. Fix it by matching your official title everywhere.
If your company uses internal title inflation, keep the letter aligned to what your payslips, HR certificate, or contract will show. Consistency matters more than seniority wording.
Problem 2: Signature Authority Mismatch
If HR signs, but the purpose describes technical negotiations, the file still works as long as HR is confirming employment and leave, not inventing the business story. In that case, keep the purpose line factual and brief, and let the Japan-side invitation carry the meeting details.
If a department head signs, keep the contact details direct. A signatory with no reachable details can trigger verification hesitation.
A practical safeguard is to avoid handwritten edits. If dates change, reissue the letter cleanly. Cross-outs and corrections read like last-minute scrambling, even when the change is legitimate.
When Your Employer Is Global, And Your Pay Is Local
Cross-border employment structures can confuse a visa file if the employer's identity is not clear.
This happens when:
-
Your contract is with a local entity, but your email domain is global
-
Your payslips come from a payroll provider with a different company name
-
Your manager sits in a different country than your payroll entity
-
Your travel is sponsored by one entity while you are employed by another
We keep it readable by doing one thing: we make the letter state who employs you and who pays in plain language, without turning the letter into a corporate structure explanation.
Two clean patterns work well.
Pattern A: Local Entity Employs, Local Entity Pays
Keep it simple. Use the local legal entity name everywhere. The letter should not suddenly introduce the global parent name unless your other documents also use it.
Pattern B: Local Entity Employs, Global Entity Pays
This is workable, but only if you write it clearly and support it consistently. The letter can say:
-
“The employee is employed by [Entity A]. Travel expenses will be borne by [Entity B], our group company, as per internal policy.”
If you do this, make sure the payer language in your funds proof aligns. If the company pays, your personal bank statement should not look like the sole sponsor unless you are explicitly self-funding.
Also, align your meeting schedule with credibility. If the letter claims you are traveling for “regional partnership meetings,” but the host invitation is from a small, unrelated firm, that mismatch creates questions. Keep the relationship line realistic and consistent.
Self-Employed Or Director-Level Applicants Without An “Employer” Letter
If you don’t have an employer in the classic sense, the mistake is trying to imitate one with artificial wording. Japan business visa files can still be strong, but the document roles shift.
Instead of an employer letter, you need a business-authored trip confirmation that covers the same core items:
-
Your role in the business
-
Why is the trip required
-
Exact travel dates
-
Who pays
-
Contact details
If you are a director visiting a Japanese partner, your letter should read like a formal business statement, not a personal note. Keep it factual.
Here are practical options that work without forcing the “employer” label:
-
A company letter on letterhead signed by an authorized partner or co-director
-
A board resolution or travel authorization summary, if your company uses formal approvals
-
A business profile snippet only if it supports credibility, not as filler
Be careful with over-documenting. Submitting ten pages of company registration material rarely fixes a weak trip story. What helps is a crisp business purpose tied to a Japan-side invitation and a believable schedule.
Also, watch the money trail. If you are self-employed and self-funding, your letter should not claim “company-funded” unless you can back that with accounts that clearly belong to the business entity.
If your meetings are with multiple Japanese counterparts, your letter should not list them all. Keep your letter focused and let the Japan-side documents and Schedule of Stay carry the details.
Once your employer-side story is clean, we move to the Japan-side packet, because that’s where your meetings become verifiable, and your host relationship becomes clear on paper.
The Japan-Side Packet: Invitation, Guarantee, And Proof The Host Is Real
Once your employer letter is clean, the Japan-side documents become the part that makes your meetings feel real on paper. Here, we focus on getting host documents that are specific, internally consistent, and easy for a reviewer to trust.
Invitation Letter That Reads Like A Business Need, Not A Favor
A strong invitation letter does not sound like someone is “helping you get a visa.” It sounds like a company inviting a counterpart for a defined business purpose, during defined dates, with defined points of contact.
You want the invitation to answer these questions without drama:
-
Who is inviting you? Full company name, address, and a real department contact.
-
Why you? Your role and why you are needed in person.
-
Why now? A reason tied to a project stage, negotiation timeline, or scheduled event.
-
Where will meetings happen? City-level clarity, and site names if relevant.
-
When are you expected? Dates that match your Schedule of Stay and flight window.
The easiest way to keep it credible is to keep it concrete. If you’re visiting for “business discussions,” that’s too broad unless the letter gives context like “annual contract renewal meeting” or “implementation planning sessions.”
Watch for wording that creates accidental questions. For example, “We request multiple entries for future visits” is fine if your employer's letter supports recurring travel. If it doesn’t, that line can turn a simple single-entry story into a confusing one.
Also, watch the “tourism bleed” problem. If the host letter includes sightseeing suggestions or weekend excursions, it can make your file look like a mixed-purpose trip. A Japan business visa packet reads best when the host letter stays business-focused and lets your personal travel choices stay off-paper.
Before you accept the invitation, run a quick quality check:
-
Does the company name match the company proof documents exactly, including punctuation and legal suffix?
-
Does the inviter’s job title make sense for inviting an overseas business visitor?
-
Does the letter list a reachable email and phone number?
-
Do the dates match the meeting schedule you plan to submit?
If anything is slightly off, fix it now. Later fixes often force you to reissue multiple documents.
Letter Of Guarantee: When It Matters And What It Signals
A Letter of Guarantee changes the tone of the file because it signals responsibility. It tells the reviewer that someone in Japan is willing to stand behind the trip logistics, expenses, or compliance expectations, depending on how it’s written.
The most common confusion is treating the guarantee as a decorative attachment. It is not. If you submit a guarantee, it needs to match your funding story and your trip structure.
Two practical rules keep it clean:
Rule 1: The guarantee must match the payer's story everywhere else.
If the guarantor says they cover expenses, your employer letter should not claim the company covers all expenses. If you are self-funding, the guarantee should not quietly imply host sponsorship unless that is truly the arrangement.
Rule 2: The guarantor identity must align with the inviter identity.
If Company A invites you, but Person B guarantees costs without connection, it creates a “why is a third party involved” question.
A guarantee often includes specifics like what is covered and who the guarantor is. That detail is useful, but it also increases the risk of a mismatch. When you see a cost statement, make sure it lines up with your other documents:
-
If the host covers local transportation and meals, your funds, proof, and employer letter should not imply that you cover everything.
-
If the host covers all expenses, your bank statement does not need to look like you are sponsoring a large trip alone. It still needs to look stable, but the logic should match.
If your host is hesitant to provide a guarantee, that is not automatically a problem. Many business trips are employer-funded, and the invitation plus schedule can be enough. What matters is that you don’t submit a half-committed guarantee that conflicts with the rest of the file.
Schedule Documents From The Host: The “Why You, Why Now” Evidence
Host-side schedule support is where your trip stops being “a plan” and becomes “a calendar.” Even when you submit your own Schedule of Stay, the host’s meeting outline can reinforce the reality of your visit.
You do not need a heavy packet. You need a small set of documents that prove the host expects you and knows what you will do.
Useful items often include:
-
A short meeting agenda or visit program (even a one-page outline)
-
A confirmation email printed to PDF that includes meeting dates, location, and contact person
-
A conference registration confirmation if your purpose includes attendance
-
A project timeline excerpt showing why the visit happens in that window
What you want to avoid is generic “welcome” language with no operational detail. A visa reviewer is trying to confirm that your trip has a real business structure. Give them that structure.
Here is a practical way to request host details without sounding demanding. Ask for three anchors:
-
Meeting dates and city
-
Meeting location type (head office, client site, factory, event venue)
-
Named the contact person for each major meeting day
Then keep the host schedule aligned with your flight window. If the host schedule shows meetings starting the day after you arrive, your itinerary should allow enough time to make that realistic. If the host schedule includes a site visit outside the main city, your Schedule of Stay should show the travel day clearly.
A common weak spot is “floating days.” These are days that appear in your trip window but have no business purpose in the schedule. For Japan business visas, floating days can look like hidden tourism. If you need a buffer day for travel recovery or internal prep, label it in business terms:
-
“Arrival and internal briefing”
-
“Preparation and document review with the host team”
-
“Contingency slot for extended negotiation session”
You’re not inventing meetings. You’re explaining why the time exists.
Company Proof: Registration And “This Business Exists” Signals
Host company proof should do one job: show the inviting entity is real and traceable. You are not trying to prove the company is “big.” You are proving it exists and matches the invitation details.
The most helpful proof documents tend to confirm:
-
Company legal name
-
Address
-
Registration number or corporate identity reference
-
Representative name if shown
-
Business category is included
Your goal is alignment, not volume. One clean proof document is often better than a stack of unrelated brochures.
Here are mismatch traps to watch for:
-
The invitation uses a brand name, but the proof document shows a different legal entity name with no link
-
The address on the invitation differs from the registered address, with no explanation
-
The inviter’s department appears on the letter, but the proof document lists a different company branch entirely
If the host operates under a group structure, ask them to keep one consistent identity on your visa documents. A group structure can be real and normal, but it becomes confusing when the invitation comes from one entity, and the proof documents belong to another.
If the host can only provide a document in Japanese, that can still be fine. The key is legibility and consistency. Make sure names and addresses are not cut off, and avoid screenshots with missing headers.
How These Documents Actually Move From Japan To You
The fastest way to derail a clean Japan business visa packet is to end up with mixed versions. This happens when documents travel through too many hands, get re-saved multiple times, or are stitched together from partial screenshots.
We keep the transfer process controlled and simple.
Start with one agreed checklist that you send to the host. Keep it short:
-
Invitation letter with correct dates and purpose
-
Guarantee a letter only if applicable to your funding story
-
Host meeting agenda or visit program
-
Host company proof document
Then enforce version control on your side:
-
Save each document with a clear filename that includes the date range
-
Keep only one “current” folder for the final submission set
-
If any date changes, ask for reissued letters rather than edited screenshots
Pay attention to document quality. Visa files often get printed and scanned. Low-resolution images can turn a clean letter into an unreadable blob, especially if stamps or signatures are light.
If the host sends multiple versions, don’t guess which one is final. Use a quick verification method:
-
Confirm the latest issue date
-
Confirm the correct trip dates
-
Confirm the correct inviter name and title
-
Confirm the company address matches the proof document
A small but important detail is signature consistency. If the invitation is signed by one person and the guarantee by another, that can be acceptable, but only if both people clearly belong to the inviting organization and their roles make sense.
Once your Japan-side packet is aligned, the next step is turning your visit into a day-by-day Schedule of Stay that matches your flight timing and makes every business day easy to follow.
Meetings Schedule That Works: Build A Day-By-Day Plan The Consulate Can Follow
Your Japan business visa schedule is not a formality. It is the document that makes your trip feel planned, accountable, and easy to verify against your flight window and host paperwork.
The “Schedule of Stay” Standard: Day-By-Day Clarity
Japan business visa reviewers want to see your time in Japan laid out in a way that reads like a real work trip. That means day-by-day structure, not a single paragraph that says “meetings in Tokyo.”
A schedule that works usually shows five things for every day:
-
Date (use the same date format across the entire packet)
-
City (keep it consistent with your invitation and employer letter)
-
Main activity (what you are doing and why it matters)
-
Place type (head office, client site, event venue, factory, partner office)
-
Contact anchor (a host department or named contact for the key meeting days)
The schedule should also respect how business trips actually run in Japan. Meetings are precise. Movement between cities takes time. And a trip that claims back-to-back meetings across distant locations in one day looks unrealistic.
Keep your language business-tight. Good schedule phrasing sounds like this:
-
“Project kickoff meeting with Product Team, scope confirmation, and timeline.”
-
“Quarterly performance review meeting, contract renewal discussion.”
-
“Technical workshop session, requirements mapping, and next-step actions.”
Avoid phrases that feel like placeholders:
-
“Meeting with company staff”
-
“Office visit”
-
“Business discussion”
If you must use a broader line, lock it to a clear outcome. For example: “Negotiation meeting, finalize pricing and delivery timeline.”
One more detail matters in Japanese business schedules: local time logic. You do not need to add time slots for every day, but your plan must not imply that you can land and attend a full meeting immediately. If you arrive in the afternoon, keep Day 1 light and believable.
Convert Your Calendar Into Visa-Ready Detail (Without Looking Overwritten)
A strong schedule starts as your real calendar, then gets edited into visa language. The trick is keeping it clean and readable, without turning it into a performance.
Here is a practical way to build it.
First, list your non-negotiables:
-
Flight arrival day and approximate arrival window
-
First major meeting day and start time expectation
-
Any fixed event dates (conference day, plant visit slot, signing meeting)
-
Return flight day and the last realistic meeting cutoff
Second, turn each business day into a structured block. You don’t need minute-by-minute detail. You do need enough structure to show the trip has shape.
A good daily structure often looks like this:
-
Morning: primary meeting or workshop session
-
Midday: internal review, stakeholder alignment, or working session
-
Afternoon: second meeting or continuation session
-
Late afternoon: documentation review, action items, follow-up planning
Notice what’s missing. There is no fluff. There is also no tourism language. It reads like a workday.
Third, match the schedule to how people move. If your schedule includes a site outside the main city, mark it as a deliberate work activity, not a casual outing. This is where short clarifiers help:
-
“On-site visit for operational review, travel time allocated.”
-
“Transit to partner office city, evening prep session.”
Fourth, keep the schedule aligned with your invitation without copying it. If your invitation lists “contract renewal meeting,” your schedule can use the same purpose line but should add day-level structure.
A quick “too much detail” warning: don’t over-engineer. When people add excessive meeting titles, exact room names, or long descriptions, the schedule starts looking written for the visa instead of written for business. We want it to look like a normal corporate plan that happens to be well-organized.
Multi-City Business Trips: When They Help And When They Hurt
Multi-city schedules can strengthen a Japan business visa file when the movement has a clear business reason. They can also raise questions when they feel like a travel tour with one token meeting.
A multi-city trip helps when:
-
Each city is tied to a different business function
Example: Tokyo for HQ meetings, Nagoya for the supplier site, and Osaka for a trade event. -
There is enough time in each city to justify the move
Example: at least a half-day to a full day of meetings in each city. -
Transit is shown as a real part of the plan
Example: “Transit and prep” is listed, not hidden.
A multi-city trip hurts when:
-
You have too many cities for the trip length
Example: three cities in four business days, with no clear reason. -
Your flight itinerary suggests one base city, but your schedule jumps elsewhere with no transit day
-
The invitation supports only one city, but your schedule adds extra cities that are not connected to the host’s business
If you truly need multi-city, use a clean structure that signals discipline:
-
City 1: primary meetings and kickoff
-
Transit day or transit window: clearly labeled
-
City 2: site visit or second stakeholder meetings
-
Final day: wrap-up meeting and departure prep
We also keep airport logic in mind. If your last business activity is in one city and your itinerary departs from another, you need a schedule line that makes that repositioning feel normal and planned.
Japan Business Visa Documents Checklist: Scenarios You Can Relate To
These examples are meant to show patterns that work for Japan business visa schedules. Use the structure, then adapt it to your real meetings and visit Japan stress-free.
Pattern 1: Single-City Tokyo Workweek With A Clear Project Arc
-
Day 1: Arrival in Tokyo, internal briefing with host coordinator, prep for next day sessions
-
Day 2: Kickoff meeting and scope confirmation, working session with the product team
-
Day 3: Stakeholder meetings across two departments, finalize timeline and responsibilities
-
Day 4: Review meeting, documentation alignment, action items, and next steps
-
Day 5: Buffer morning for follow-up session, depart after midday
Why it works: it shows a logical progression from kickoff to delivery steps, with realistic pacing.
Pattern 2: Tokyo Meetings Plus A One-Day Event That Fits The Business Purpose
-
Day 1: Arrival, prep, and internal alignment
-
Day 2: Client meeting, solution walkthrough, next-step plan
-
Day 3: Event attendance (conference or industry meeting), scheduled networking slot with named host contact
-
Day 4: Post-event follow-up meeting, commercial terms discussion
-
Day 5: Final wrap-up meeting, depart
Why it works: the event day is framed as part of business outcomes, not a loose activity.
Pattern 3: Tokyo HQ Meetings Plus One Operational Site Visit Outside Tokyo
-
Day 1: Arrival, prep
-
Day 2: HQ strategy meeting, implementation planning
-
Day 3: Transit to operational site city, on-site review meeting, return or overnight depending on distance
-
Day 4: HQ follow-up, finalize deliverables and responsibilities
-
Day 5: Depart
Why it works: the site visit is shown as an operational necessity with time allocated for movement.
A timing note that prevents common schedule mistakes: if you are departing from Delhi on a late-night flight and reaching Japan after a long connection chain, don’t schedule a full formal meeting on your arrival day morning. Keep Day 1 light and shift the first primary meeting to Day 2.
The Meeting-Schedule Mistakes That Trigger Follow-Ups
Most Japanese business visa follow-ups come from schedules that look unclear, inconsistent, or physically impossible. These are the mistakes we catch before submission.
Mismatch Errors That Get Noticed Fast
-
Schedule dates do not match the employer letter dates.
-
Schedule dates do not match your flight itinerary window.
-
Host invitation mentions one city, schedule focuses on another.
-
The company name appears in different forms across the schedule and the invitation.
-
Your job role in the employer letter does not fit the scheduled activities.
Example: a role listed as finance, but the schedule is purely technical workshops with no finance context.
Credibility Errors That Make The Plan Look Artificial
-
Overloaded days with too many meetings and no travel time.
-
A schedule with a “free day” in the middle of a short business trip.
-
Activities that sound like tourism inside a business schedule.
-
Repeated vague lines like “business meeting” for multiple days with no added detail.
Contactability Gaps That Create Verification Risk
-
No named contact for key meeting days.
-
“Various partners” are listed without any anchor organization.
-
Meeting locations are described too broadly to understand the city's logic.
Example: “office meeting” without indicating the city when your trip includes more than one city.
Time Logic Errors Linked To Flights
-
Arrival day schedule assumes you can attend meetings before you land.
-
Last meeting day is shown as full-day work, but your return flight is early morning.
-
The schedule ends in a different city than your departure airport, with no transit listed.
A Quick Fix Checklist We Use Before Finalizing The Schedule
-
Every day has one clear business purpose line.
-
Transit is acknowledged when cities change.
-
The first heavy meeting day is not the arrival day unless you genuinely arrive early and stay local.
-
The last business activity ends with enough time to reach the airport realistically.
-
City names and company names are consistent with the host documents.
-
The schedule reads like something a host company would recognize as a real visit plan.
Once your schedule is tight and realistic, your funds proof becomes easier to present because the trip length, sponsor story, and spending expectations are now clearly defined.
For travelers seeking convenience in obtaining proof of onward travel, online booking for dummy tickets stands out as a game-changer. These services provide a secure, efficient way to generate verifiable flight itineraries tailored to your visa needs, ensuring compliance with embassy requirements without the hassle of traditional bookings. With features like instant PDF delivery and PNR verification, you can quickly obtain a dummy ticket for visa application proof that aligns perfectly with your Japan business visa documents. The process is straightforward: select your routes, enter details, and receive your document in minutes, all while enjoying robust security measures to protect your information. This not only saves time but also reduces stress during the mid-stages of your application, allowing you to focus on other critical elements like employer letters and meeting schedules. Moreover, many platforms offer unlimited changes, enabling you to adjust dates as your plans evolve without additional costs. By choosing a trusted provider, you ensure your dummy ticket meets international standards, enhancing your application's strength and keeping you engaged as you progress toward submission. Embrace this modern solution to streamline your preparations and boost your chances of approval. Why wait? Secure your risk-free PDF today and move forward confidently.
Funds Proof That Feels Natural To Japanese Immigration Services Agency
Your Japan business visa funds proof should look like a normal financial life backing a normal work trip. Here, we focus on showing money in a way that matches your sponsor story and your meeting schedule without creating new questions.
Pick One Funding Story For Your Business or Employment Visa And Prove It Cleanly
Before you choose which statements to print, we lock the funding story. This is where many Japanese business visa files get messy, because the packet quietly shifts from “company trip” to “personal trip” depending on the document.
Use one of these clean funding models and stick to it everywhere:
-
Employer-Funded: Your employer covers most costs, and your statements show personal stability, not full sponsorship.
-
Self-Funded: You cover costs, and your statements show you can fund the exact trip length and pace you’re claiming.
-
Host-Supported: The Japan-side host covers defined costs, and your documents show that arrangement clearly and consistently.
Now match the proof to the model.
If your employer funds the trip, your employer's letter should state coverage clearly. Your personal statements should still look healthy, but they do not need to look like you are paying for everything.
If you self-fund, don’t rely on “we’ll manage somehow” energy. Your statements should reflect a balance that makes sense for flights, local movement, and daily expenses across the dates you listed.
If the host supports costs, keep the scope clean. It’s fine if the host covers some categories and you cover others. It becomes confusing when no document tells the reader what that split is.
A practical check we use is the “payer sentence test.” Wherever costs are mentioned, the payer should not change. If you see three different payer sentences across your packet, fix that before you print anything.
Bank Statements For Visa Application: The Pattern Officers Trust
For Japan business visas, bank statements work best when they feel routine. A reviewer is not only looking at the closing balance. They are reading the pattern.
Here are the patterns that typically feel stable and believable:
-
Regular inflows that match your salary or business income rhythm
-
Normal spending behavior that does not suddenly freeze or spike just before application
-
A consistent running balance rather than dramatic swings with no explanation
-
A statement period that covers enough history to show this is your real account, not a temporary staging account
Your statements should also be readable. If the formatting is cramped or if pages are cropped, it invites mistakes during review.
We also recommend doing a quick statement hygiene check before you submit:
-
Your name is visible and matches your passport name format
-
Account number is partially visible or shown in a standard masked format
-
Statement pages are complete and in order
-
Currency is clear on each page
-
Any major deposits have an explanation ready if needed
Avoid last-minute “balance engineering.” Even if the money is legitimate, a sudden large deposit right before submission can trigger extra questions because it breaks the pattern. If a deposit is unavoidable, we handle it the right way, which we cover below.
Salary, Taxes, And Corporate Support Documents Required
Statements show flow. Supporting documents show why that flow makes sense.
If you are employed, you usually want a tight set of evidence that supports your income identity:
-
Payslips that match the inflow pattern on your bank statement
-
Employment confirmation that matches your job title and employer name
-
Tax evidence that supports your income level if it’s standard in your country
-
Company coverage proof if your employer is paying (a clear employer letter is often the key piece)
If you are self-employed, you want proof that your business income is real and sustainable, without burying the reviewer in paperwork:
-
Business registration or license proof that matches your business name on financial records
-
Business bank statement, if that is where your income actually lands
-
Tax filings or accountant summaries, if those are standard and easy to read
-
A short, factual note if your income is project-based and arrives in uneven chunks
The most important rule is naming consistency. If your payslips say one employer entity and your employer letter uses another, your funds proof starts to look disconnected from your travel purpose.
A simple way to keep this clean is to align three identifiers across everything:
-
Employer or business name
-
Your role title
-
Your income channel (salary, dividend, owner draw, contract payments)
When these align, your funds proof feels like a support document, not a separate story.
Currency, Transfers, And “Big Money Moves” Without A Long Explanation
Cross-border transfers and large deposits are common in real life. The problem is not the transfer. The problem is leaving it unexplained when it changes the pattern.
We handle big moves with a short, factual approach.
If you received a large deposit recently, ask two questions:
-
Does it materially change the impression of your ability to fund the trip?
-
Does it look unusual compared to your normal statement pattern?
If the answer is yes, attach a short explanation and one supporting proof. Keep it brief. Two or three lines usually do more good than a long paragraph.
Here are common legitimate reasons that can be explained cleanly:
-
Bonus payout (support with a payslip or employer note)
-
Contract payment (support with invoice and payment proof)
-
Savings maturity or fixed deposit redemption (support with maturity advice)
-
Sale of an asset (support with a sale agreement or bank credit advice)
-
Transfer from another personal account (support with the source account statement showing the debit)
Keep the language plain. Avoid defensive tone. You’re not arguing. You’re clarifying.
Also, be careful with rapid “in-and-out” movement. If a large deposit appears and then leaves the account quickly, it can look like temporary positioning. If you must move funds, make sure the ending balance still looks stable, and the transfer trail is easy to understand.
If your statements are in a currency different from what your schedule implies you’ll spend in Japan, you can add a simple one-line conversion note in your cover letter or on a separate note page. Keep it conservative and clean. Don’t build a spreadsheet that looks like you’re trying to prove too much.
Split Funds Across Accounts Or Joint Accounts
Many applicants don’t keep everything in one account. That’s normal. The goal is to make it easy to read.
If your funds are split across accounts, you have two clean options:
-
Option 1: Submit one primary account that clearly covers the trip needs and keep other accounts out unless required.
-
Option 2: Submit two accounts with a short summary line explaining why (salary account plus savings account, for example).
What we avoid is submitting five accounts with tiny balances. That creates noise and makes your financial story harder to trust.
For joint accounts, clarity matters more than the balance. A joint account can work well if:
-
Your name is clearly shown as an account holder
-
The inflow pattern makes sense for your household structure
-
You can explain how you access the funds for the trip
If the joint account belongs mainly to someone else and your name appears as a secondary holder, we keep the use-case simple. Use your own account as primary where possible, and treat the joint account as supplemental.
If you plan to use a family sponsor, be careful. Japan business visa packets usually read best when the trip is supported by your employer, your own finances, or a clearly documented Japan-side sponsor arrangement. A family sponsor can add complexity unless it is necessary and well-documented.
A quick readability checklist for multi-account submissions:
-
Label one account as primary in your cover note
-
Keep statement periods consistent across accounts
-
Avoid overlapping transfers that create confusing circular movement
-
Make sure totals align with the payer story from your letters
With your funds proof aligned and easy to read, we can move into the uncommon risk points and the final consistency audit that catches the small mismatches before the consulate does.
Before Submitting Japan Visa Fees: Look Out For These Exceptions And Risks
Before you submit a Japan business visa application, run one last audit with fresh eyes. It saves you from paying Japan visa fees twice because a small mismatch triggers additional documents or a reissue request.
Uncommon Profiles That Get Extra Scrutiny
Some cases get reviewed more slowly because the story can look unclear on a quick scan. If you’re the visa applicant in one of these categories, we tighten the file and reduce avoidable complexity.
Recent job changes often need cleaner logic. Your employer letter should show why you, why now, and why the meetings cannot be handled remotely. Keep the dates tight and the role description realistic.
Contractors and independent consultants also get a closer reading. The reviewer wants to see who is accountable for the trip and who pays. If you work with a client, keep the relationship chain simple and documentable.
New businesses can work fine, but they need a sharper purpose. Your Japan-side packet should include company proof that looks official, including incorporation details that match the inviting entity’s jurisdiction, not a marketing deck.
If you have a travel history that includes various types of Japan visas, keep your current purpose clean. A business trip should not look like a tourism trip on paper.
If you are students doing a short business visit for a conference-linked meeting, make sure your file still reads as business. Don’t let the schedule drift into leisure time blocks.
If you hold residence abroad, align your submission location with your paperwork. A consulate general may expect proof that you live in their area, and the documents required can vary depending on local rules.
Multiple-Entry Requests: What Extra Strength Usually Looks Like
Multiple entries can work well, but it needs a repeatable business reason. We keep the request grounded in business rhythm, not vague ambition.
Start by showing why follow-up visits are likely. Think recurring governance meetings, phased implementation, or scheduled supplier checks planned in advance. Your employer letter should support that cadence without sounding exaggerated.
Your Japan-side packet should also show continuity. An original invitation letter that mentions ongoing workstreams helps, especially when the host and your employer use the same project language.
Keep the trip pattern realistic. Multiple entry does not require a complicated route. It requires dates and meetings that look like a real working relationship.
Also, check category clarity. Japan visa categories can be strict, and the line between a short business stay and other labels can blur if your documents mention unrelated goals. If you are coming for business, don’t mix in language like medical treatment, even as a side note, because it weakens the file’s purpose signal.
If you’re unsure whether you’re eligible for multiple entries, confirm eligibility before you request it. A clean single-entry approval is often better than a shaky multiple-entry story that invites questions.
Last-Minute Changes Without Breaking Your Packet
Business plans change. The goal is to update the right pages so your packet still reads like one timeline.
When dates shift, update anything that contains date logic:
-
Flight itinerary or dummy flight ticket PDF
-
Schedule of Stay
-
Employer letter, if it states exact dates
-
Host an invitation or guarantee if they state exact dates
Avoid patchwork edits. If a document is reissued, keep the new file clean and complete.
Also, keep your timeline realistic. Don’t move flights without adjusting meeting times and city sequence. A late arrival cannot support a morning kickoff in another city.
If your meeting location changes, update the schedule first. Then align the itinerary and letters. That order prevents you from leaving behind old city names in the wrong place.
If you need to obtain a reissued host letter quickly, give the host one clear instruction: match the in-Japan dates exactly and keep the company name and address unchanged from their proof document.
The Consistency Audit: The 10-Minute Test Before You Submit
Here, we focus on a fast audit that catches the issues that cause delays at a Japanese visa application centre.
Open these items together:
-
Your visa application form
-
Passport copy and your passport-size photograph or photograph file, depending on your submission method
-
Flight itinerary
-
Employer letter
-
Host invitation and guarantee, if used
-
Schedule of Stay
-
Funds proof
Now run the audit in this order.
Name and identity match first. Your full name must match the passport spelling across every page. Don’t switch order, initials, or middle names between documents.
Next, confirm the trip window. Your in-Japan dates must match across the schedule, letters, and itinerary. One day off can trigger a reissue request.
Then check the payer language. Your employer letter, host paperwork, and funds proof must describe one sponsor's story. A mixed payer story is a common reason for follow-up.
Now check the purpose language. The employer letter and host invitation should describe the same goal using compatible wording. If one says negotiations and the other says training, you’ve created doubt.
Confirm city and airport logic. Your itinerary should place you where the schedule says you will be. If the schedule ends in one city but your departure airport is elsewhere, add a transit line.
Finally, check contactability. Host company details should match their proof documents, and the employer contact should be reachable.
If you need official confirmation of local steps like visa fee payment timing or processing time, refer to your mission’s instructions and consult the Japan visa information hotline, where available.
Visa Applicant Mistake Checklist (25 Silent Errors)
These are the small mistakes that create delays, especially for foreign nationals applying through busy missions.
-
The passport name format differs between the employer letter and the itinerary.
-
The middle name appears in one document but not another.
-
The job title differs between the employment proof and the employer letter.
-
The employer's letter states dates that don’t match the Schedule of Stay.
-
Host letter dates don’t match the flight itinerary.
-
The invitation references Tokyo, butthe schedule centers on another city without transit.
-
The schedule shows meetings before your flight arrival time.
-
Return flight conflicts with the last meeting day.
-
Sponsor statement changes between the employer and host documents.
-
Funds proof shows a sudden, large deposit without context.
-
Bank statement pages are missing or out of order.
-
The host company name differs from the company proof spelling.
-
The host address differs from the company's proof address.
-
The host signatory title does not match the inviter role.
-
Employer contact details look generic or unreachable.
-
The schedule uses vague activity lines across multiple days.
-
The multi-city plan has no transit time built in.
-
The itinerary route looks needlessly complex for a short stay.
-
You mention a spouse visit or personal plans in business documents.
-
Proof of residence is missing where the local mission expects it.
-
A lease agreement is submitted, but it does not show your name clearly.
-
Your nationality details are inconsistent between forms and supporting pages.
-
Submission location does not match your current residence documents.
-
You submit extra pages that introduce new contradictions.
-
You forgot to align the document issue dates after a last-minute change.
If you are a foreigner applying outside your home country, keep your proof of legal stay simple and clear. In some places, that can matter more than extra financial pages.
If You Get A Document Request Or A Refusal
If the mission asks for additional documents, treat it as a precision request, not a personal setback. Respond with the smallest set of pages that fixes the root issue.
First, identify what they are really questioning:
-
Dates and schedule logic
-
Sponsor clarity
-
Host credibility
-
Employment and role clarity
-
Proof of residence in the submission area
Then rebuild only the affected chain. If dates are questioned, update the itinerary, schedule, and any letter that states dates. If the sponsor is questioned, align the employer letter, guarantee language, and funds proof.
Keep the response pack clean. One corrected document plus one supporting proof is often enough.
Also, be aware of payment rules. In many locations, the visa fee and any service charge are non-refundable, so it’s worth tightening the file before you pay the fee at the centre.
If you’re applying under special local conditions, double-check where to submit. Some missions route business visas through a Japan visa application centre, while others handle them directly through the consulate general.
For context, requirements can vary depending on where you apply and your nationality. For example, an applicant who is an Indian national applying in India may be asked for different proof-of-stay pages than a foreign national applicant with residence in Canada, Australia, or China, even when the Japan business trip itself is identical.
If you’re ever unsure which office controls your entry outcome after approval, remember the approval decision is made before travel, and your ability to enter Japan is later assessed at the border by the Immigration Services Agency, so your documents should still read as consistent and business-clear when you travel.
👉 Order your dummy ticket today
For more on international travel requirements, visit the IATA website.
Enter Japan With A File That Reads Cleanly From Start To Finish
A Japan business visa packet feels strong when every document tells the same story. Your flight itinerary frames the dates, your employer letter explains the purpose and payer, your Japan-side invitation backs the meetings, and your Schedule of Stay makes each day easy to follow. When those pieces match, you reduce back-and-forth and keep your application moving.
Now you can assemble your final set, run the quick consistency check one last time, and submit with confidence at the consulate or visa application centre handling your location.
Why Travelers Trust dummyflights.com
dummyflights.com has been helping travelers since 2019 with specialized dummy ticket reservations for visa applications. With over 50,000+ visa applicants supported, dummyflights.com offers 24/7 customer support, secure online payments, and instant PDF delivery.
As a real registered business with a dedicated support team, dummyflights.com ensures no fake or automated tickets—only verifiable, embassy-ready documents. This niche expertise builds trust and reliability for your travel needs.
Related Guides
As you finalize your Japan business visa application, remember to prioritize embassy-approved documentation to ensure a seamless process. A reliable dummy ticket serves as essential proof of onward travel, demonstrating your intent to leave the country after your stay. Opt for services that provide verifiable PNR codes and instant PDFs, as these align with strict visa requirements and help avoid rejections. Reinforce your submission with consistent details across all papers, from employer letters to financial proofs, to build a compelling case. For comprehensive insights, explore what is a dummy ticket and how it fits into your strategy. This knowledge empowers you to present a professional, trustworthy application that stands out. Don't overlook the importance of flexibility—choose options with unlimited changes to adapt to any shifts in plans. By following these tips, you'll enhance your chances of approval and embark on your journey with confidence. Take the next step now and secure your dummy ticket for a smooth visa experience.
About the Author
Visa Expert Team — With over 10 years of combined experience in travel documentation and visa assistance, our editorial team specializes in creating verifiable flight and hotel itineraries for visa applications. We have supported travelers across 50+ countries by aligning documentation with embassy and immigration standards.
Editorial Standards & Experience
Our content is based on real-world visa application cases, airline reservation systems (GDS), and ongoing monitoring of embassy and consular documentation requirements. Articles are reviewed and updated regularly to reflect current practices.
Trusted & Official References
- U.S. Department of State — Visa Information
- International Air Transport Association (IATA)
Important Disclaimer
While our flight and hotel reservations are created to meet common embassy requirements, acceptance is not guaranteed and may vary by country, nationality, or consulate. Applicants should always verify documentation rules with the relevant embassy or official government website prior to submission.
Related Posts
Order a Dummy Ticket Online
22 Jul, 26
Dummy Ticket for UAE Visa
22 Jul, 26
Can Dummy Ticket Be Verified?
22 Jul, 26
How Do Airlines Check Dummy Tickets?
22 Jul, 26
Dummy Ticket for UK Visa
22 Jul, 26
Dummy Ticket With Long Validity
22 Jul, 26
How to Get Dummy Flight Tickets in India
22 Jul, 26
Dummy Ticket Pricing: Normal vs Scam
22 Jul, 26
How to Book a Dummy Ticket for Visa
22 Jul, 26
Dummy Ticket PDF Sample for Visa
22 Jul, 26