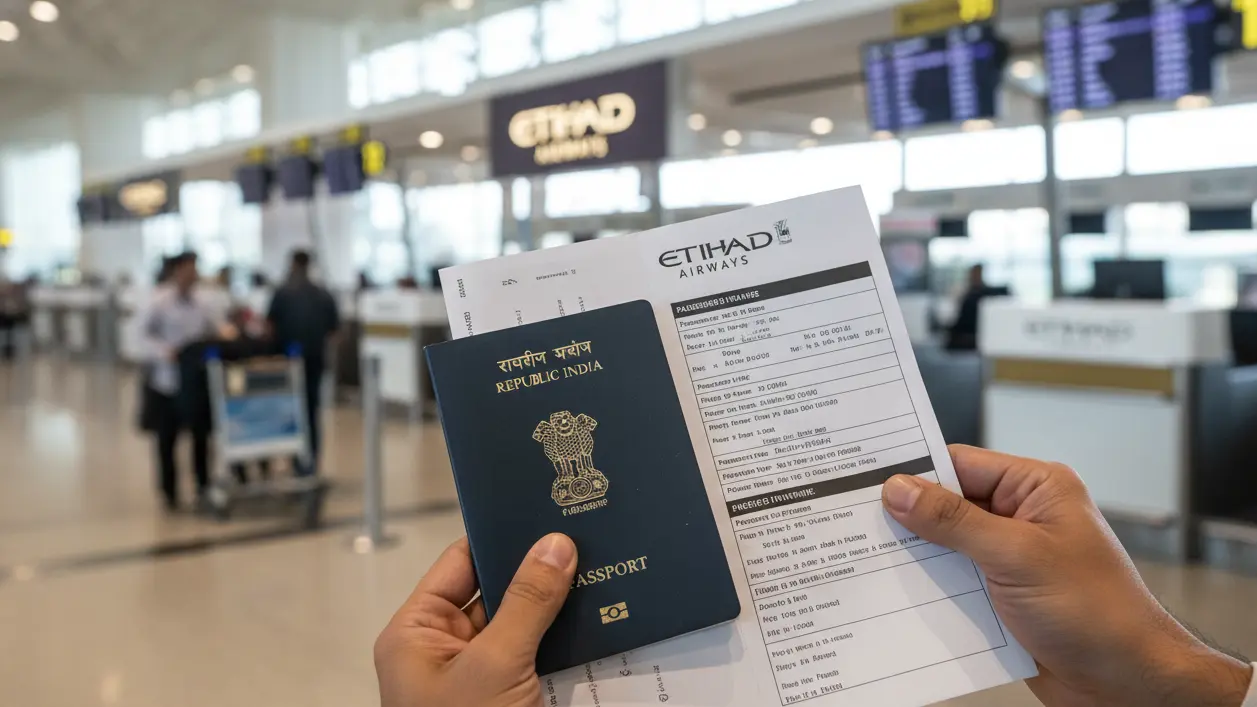
Which Ticket Format Actually Proves Exit in 2026?
Your visa file looks solid until the officer spots an itinerary that does not clearly show you leaving. A simple return can pass in seconds, while an open-jaw or multi-city can trigger a request for clarification or a refusal. Then the airline adds its own rules at check-in, often stricter than the embassy's. Proof of exit gets judged more than once.
In this guide, we choose the right ticket shape for your plan in 2026. We map when a return ticket is safest, when open-jaw works without raising questions, and when multi-city is worth the extra legs. If check-in staff need a clear exit leg, a dummy ticket can show an easy-to-read return, open-jaw, or multi-city exit. For more insights, check our blogs or FAQ.
Return ticket is one of the most commonly accepted documents used to prove exit plans when traveling internationally. While immigration authorities usually do not require travelers to purchase a fully paid flight in advance, they do expect a verifiable proof of onward or return travel that clearly confirms how and when you will leave the destination country.
A professionally issued and verifiable return ticket is often the safest and simplest option to satisfy proof-of-exit requirements, especially when compared to open-jaw or multi-city itineraries that may require additional explanation during visa or immigration checks.
Last updated: July 2026 — verified against current airline policies, immigration entry rules, and international travel documentation standards.
Table of Contents
- Proof Of Exit Gets Judged Three Times - And Each Judge Uses Different Rules
- Return Tickets: When The Simple Round-Trip Is The Strongest - And When It Looks Weird
- Open-Jaw Itineraries: “I’m Leaving, Just Not From Where I Arrived” Done Right
- Multi-City Bookings: The Most Convincing Proof Of Exit - Or The Fastest Way To Create Red Flags
- Pick Return Vs Open-Jaw Vs Multi-City Based On How You’ll Be Judged
- Build A Proof-Of-Exit Reservation That Stays Verifiable Until Approval
- Where Applicants Get Burned: Exceptions, Risks, And Uncommon Failure Modes
- Return Ticket Vs Open-Jaw Vs Multi-City: Choose The Ticket Shape That Gets You Cleared Twice
Key Takeaways #1: Choosing the Right Ticket Format for Proof of Exit
- Return tickets are safest when your trip has one clear base city and you want minimal interpretation from visa officers and airline staff.
- Open-jaw works well for one-directional trips but only if the exit clearly leaves the correct country or zone and the middle movement is obvious.
- Multi-city is strongest when you need to show a visible exit from a region like Schengen or when your declared itinerary includes one logical internal move.
- Always keep your ticket format consistent with what you wrote in your visa application forms.
Proof Of Exit Gets Judged Three Times - And Each Judge Uses Different Rules

Your itinerary can pass a Schengen visa review, then get challenged at airline check-in, then get questioned again at the border.
The “Three Readers” Model: Visa Officer Vs Airline Staff Vs Border Control
For a Schengen short-stay file, the consulate reads flights as a risk signal. They want a clear entry, a clear exit, and dates that match your online form. If you enter Paris but exit from Rome on an open-jaw, the officer must infer your middle plan, and inference creates delays.
Airlines read itineraries for liability. On a one-way check-in to Bangkok with a visa-on-arrival plan, staff often ask for an onward flight because the carrier can be penalized if you are refused entry. A return answers fast. A multi-city can also work, but only if the last leg clearly leaves Thailand, not just Chiang Mai to Phuket.
Border control uses the itinerary as a credibility test. At Narita on a temporary visitor entry, an officer may check whether your departure sits inside the allowed stay and whether the exit is visible. If your “Tokyo to Seoul” segment is on a separate booking that is hard to see, you can get stuck explaining what the officer cannot verify.
We reduce surprises when we design for all three readers. Use this three-pass check:
- Consulate pass: Does “first entry Spain” on a Schengen file match an arrival into Madrid?
- Airline pass: Is there a clear exit, like Manila to Singapore, to show you will leave the Philippines?
- Border pass: Does the departure look feasible, like Dubai to London after a UAE visit?
What They Actually Look At In 2026: Paper PDF Vs Live PNR Vs Timeline Logic
A UK Standard Visitor officer may start with the PDF, but consistency matters more in 2026. If your form, your reservation, and your supporting documents disagree, the file reads as unstable.
Start with what they can cross-check quickly. Your passport name must match the reservation spelling. Your travel dates must match what you typed online. Your city pair must match your declared plan, like “arrive Barcelona” in your Schengen form instead of a different airport you never mentioned.
Then comes timeline logic. A multi-city trip that loops Paris to Dubai to Istanbul to Paris in six days can look like a proof-only pattern. A return that departs three hours after arrival in Toronto looks like an error. An open-jaw that arrives in Amsterdam and departs Milan with no visible connection invites “How are you moving?”
Airlines also care about display. If your exit is on a separate booking, staff may treat you as having no onward travel, especially on self-transfer routes. That is how a Singapore entry becomes a boarding dispute even when you have Singapore to Kuala Lumpur booked.
Plan for three signals:
- Clarity: one scan shows “Lisbon in, London out.”
- Verifiability: the same dates appear on your Japan visa form and your reservation.
- Logic: routing reads like a trip a person would take.
Proof Of Exit Vs Proof Of Onward Travel (They Sound Similar; They Fail Differently)
In Schengen, the UK, and many island entries, “onward” and “exit” get used interchangeably, but officers and airline desks do not treat them as the same proof.
In the Schengen Area, Paris to Rome is onward travel, but it is not proof of exit from Schengen. If your itinerary stays inside the zone, add a segment that leaves it, like Rome to London or Rome to Istanbul, based on your route.
In a single-jurisdiction visit, onward can be enough. Singapore to Kuala Lumpur shows you crossing a legal boundary. For Bali, Denpasar to Kuala Lumpur can do the same, but airlines often ask for it firmly at check-in.
Your ticket shape controls how obvious that exit looks. Return is one line. Open-jaw works when your departure airport is clearly outside the place you enter. Multi-city works when the final leg leaves the correct country or zone.
The Hidden Constraint: Your Visa Validity Window Must “Contain” Your Travel Story
On a Schengen file or a Canada TRV plan, dates that do not fit the stay you requested can sink an otherwise strong application.
On a Schengen file, if your itinerary exists after the dates you asked for, it can look like an intended overstay. On an Australia Visitor (subclass 600) plan, if your itinerary implies three months but your documents support two weeks, you create a credibility gap.
Time zones create quite a few inconsistencies. A late flight out of Los Angeles and arrival in Tokyo two days later can shift calendar dates. If your form says April 10 but your itinerary shows April 11 local time, the reviewer may treat it as a mismatch, not a time-zone nuance.
Open-jaw and multi-city make the day count easier to misread. If you enter France on June 1 and exit Italy on July 2, make sure that the duration matches the length you requested in the Schengen form and any cover letter dates.
Quick Calibration: How Risk-Tolerant Should Your Proof Of Exit Be?
Not every application needs the same complexity. First-time Schengen files usually benefit from the least interpretable format. A repeat traveler on a Japan multiple-entry file can sometimes use open-jaw, but only if the middle movement is obvious.
Ask three checkpoint questions:
- Airline strictness: a one-way ticket to Istanbul with a short stay and no visible return.
- Consulate scrutiny: a first Schengen trip with a long-requested stay.
- Border habits: entries like Manila or Bangkok, where onward questions are common.
If any answer is “high,” simplify. Use a return ticket or a minimal multi-city that shows entry and a clean exit outside the correct jurisdiction. If risk is low, open-jaw can be efficient, but do not leave the exit open to interpretation.
With the three readers clear, we can now look at return tickets and when the simple round-trip is the strongest proof of exit.
Key Takeaways #2: Return vs Open-Jaw vs Multi-City — Quick Decision Guide
- Choose Return when your trip has one clear base city and you want the simplest, least questionable format for both visa officers and airline staff.
- Choose Open-Jaw when your real trip is genuinely one-directional and the exit clearly leaves the correct jurisdiction without needing extra explanation.
- Choose Multi-City when you must show a visible exit from a region (like Schengen) or when your declared plan includes one logical internal move.
- Never add extra legs just to make the itinerary look more complete — it often creates more questions than it solves.
Return Tickets: When The Simple Round-Trip Is The Strongest - And When It Looks Weird

A return itinerary is the fastest format for a reviewer to understand. It can also be the easiest format to misread if your dates, airports, or transits create avoidable questions.
When A Return Ticket Is The Best Tool (Even If You Won’t Use It)
Return tickets shine when your visa file benefits from a single, complete “entry and exit” story that needs no interpretation.
Use a return shape when one of these applies:
- You are applying for a first-time Schengen short-stay, and your trip is built around one base city or one main country of stay. A simple inbound and outbound to the same country often reduces follow-up requests.
- You are applying for a UK Standard Visitor, and your plan is a straightforward visit with a set end date. Return flights help align your leave date with what you wrote in your application and what your bank activity can support.
- You are flying to a destination where airlines frequently ask for onward travel at check-in, such as the UAE on a tourist entry, the Philippines on a short visit, or Indonesia when you arrive on a visa-on-arrival plan. A return itinerary is easy for staff to accept quickly because it shows you leaving the same jurisdiction you entered.
- Your trip has one “home base,” even if you plan day trips. For example, you enter and exit via Madrid and do side trips by train. A return ticket keeps the flight proof clean while your internal movement stays off the flight story.
A return format is also useful when you do not want to “commit” to a complex route yet. You can keep the itinerary simple for the visa decision, then adjust later once the visa is issued and your actual routing makes sense.
The Two Ways Return Tickets Fail: Timing Suspicion And Geography Confusion
Return tickets usually fail on logic, not on appearance. Two patterns cause most of the avoidable scrutiny.
1) Timing suspicion
This happens when your dates look inconsistent with the visa you are requesting or with normal travel behavior.
Common triggers:
- Return too soon to be plausible. Example: you apply for a South Korea tourist visa with a stated plan of visiting Seoul and Busan, but your return is 36 hours after arrival.
- Return set exactly at the maximum allowed stay. A Schengen itinerary that exists on day 90 can be legal, but it often raises an unhelpful question: “Are you planning to use the full limit?”
- Return far longer than your stated purpose. Example: you write “two-week holiday in Canada,” but the return flight is booked seven weeks later.
- Return date conflicts with your own documents. If your employment letter supports leave from March 3 to March 17, but the return flight is March 24, you create a mismatch that invites a correction request.
A practical fix is to align the return date with the story you already told elsewhere.
- If your application says 10 nights, make the return land inside that window.
- If your leave approval ends on a Friday, do not set your return for the following Wednesday unless you have a clear reason that appears elsewhere in your file.
2) Geography confusion
Return tickets can still cause geography confusion because forms and reservations do not always describe locations the same way.
Watch for:
- City codes that hide the real airport. “NYC” can mean JFK, EWR, or LGA. Some visa forms want the exact airport or at least a consistent city-airport pairing across documents.
- Multi-airport cities that look like a different place. “London” is not one airport. If your itinerary shows arrival at Heathrow and return from Stansted, it is still a return trip, but it can look like two different travel patterns if your forms list only “London.”
- Nearby-country airport choices that look like a detour. Flying “into Geneva” but putting most of your stay in France can be fine, but if your hotel list, itinerary notes, and main-country selection do not match, the return ticket stops being a simplifier.
Run a simple consistency check before you submit:
- Your form’s “arrival city” matches the itinerary’s arrival airport city.
- Your form’s “departure city” matches the itinerary’s departure airport city.
- Your stated “main destination” fits the airport you actually use.
“Return” Doesn’t Mean “Safe”: The Transit Trap Inside A Round Trip
A return itinerary can still create problems when the routing includes a transit that changes your legal or practical situation.
The return shape hides complexity because it looks simple at the top line. The risk sits inside the connection details.
Transit traps to watch:
- Self-transfer connections. If your outbound is “Home → City A” and “City A → Destination” on separate tickets, you may need to clear immigration, collect bags, and re-check in. That can trigger transit visa requirements or airline refusal risk.
- Airport changes inside a transit city. A route that arrives at one airport and departs from another can turn a “transit” into an entry. That matters in places where airside transit rules are strict.
- Overnight connections that effectively become a stay. A 14-hour layover that requires leaving the airport can change what documents you need and what questions you get.
- Transit through countries with tight transit rules for certain passports. Even when the destination visa is fine, an unexpected transit requirement can break the trip at check-in.
A safer build approach for return itineraries:
- Prefer single-ticket connections when possible.
- Avoid airport changes in the connecting city.
- Keep connections in the “normal” range so the itinerary reads like a standard commercial route, not a puzzle.
If your return itinerary must transit somewhere sensitive, make the transit clean. Same airport. Same ticket. Reasonable layover. That reduces the chance your proof of exit turns into a proof of compliance debate at the counter.
How To Make A Return Itinerary Look Coherent Without Over-Optimizing It
Many applicants accidentally make return itineraries look artificial by polishing them too much. Reviewers notice patterns that look engineered.
Avoid these coherence mistakes:
- Perfect symmetry that looks fabricated. Same departure time down to the minute, same flight number pattern, and a return exactly 7 or 14 days later can look “constructed” even if it is technically valid.
- Unrealistic pace. Arriving late at night and departing early the next morning across long-haul routes can look like a placeholder rather than a real plan.
- Route logic that ignores your declared itinerary. If your cover letter says “stay in central Rome,” but your flights arrive and depart from a different country’s airport because it was cheaper on paper, you force the reviewer to reconcile contradictions.
A better approach is to make it boringly believable:
- Pick flights at normal hours.
- Keep the return date consistent with your stated trip length and leave approval.
- Match the entry airport to the country you list as your main destination.
- Keep the routing direct when a direct option exists, unless your budget story clearly explains why you connect.
Use this quick “believability scan”:
- Could a real tourist reasonably take these flights without rushing or backtracking?
- Does the arrival date give you enough time to do what you claim you will do?
- Does the departure date fit your stated end date and responsibilities back home?
What To Attach With A Return Ticket (When You Want To Say Less, Not More)
A return itinerary works best when you let it do the talking. Extra attachments can dilute clarity if they introduce alternative routes, conflicting dates, or unnecessary detail.
Attach only what supports verification and alignment:
- The page shows your name, route, dates, flight numbers, and booking reference if it exists.
- If your visa portal asks for it, include the full itinerary page that shows both outbound and inbound in one place.
Avoid adding documents that create new questions:
- Multiple alternative itineraries with different dates.
- Extra flight options “just in case” that contradict the main plan.
- Separate onward tickets that do not match the return dates and make the file look undecided.
If your return itinerary includes a connection that could confuse a reviewer, we can add one tight clarification line in a cover note, not a long explanation. Example: “Connection in Doha is airside on one ticket.” Keep it factual and minimal.
Return tickets are powerful because they reduce interpretation, but not every real trip starts and ends in the same city, which is where open-jaw itineraries can solve the same proof-of-exit problem with fewer compromises.
👉 Order your dummy ticket today
Open-Jaw Itineraries: “I’m Leaving, Just Not From Where I Arrived” Done Right

Open-jaw flights can look very credible on a visa file because they match how real trips happen. They can also trigger questions fast if your itinerary forces the reviewer to guess the missing middle.
Open-Jaw Has Two Common Shapes—Only One Is Usually Visa-Friendly
Open-jaw is not one thing. It comes in two shapes, and they behave differently under visa scrutiny.
City-open-jaw (usually safer): you enter and exit the same country or visa zone, but from different cities.
Example: Tokyo (arrive) and Osaka (depart) for a Japan temporary visitor plan.
Why it reads well:
- The country of stay stays constant.
- The exit is still obvious because the departure flight leaves the same jurisdiction you entered.
- The “different city” detail feels like normal tourism, not a routing trick.
Country-open-jaw (often riskier): you enter one country and depart a different country.
Example: Arrive in Vienna, depart from Budapest on a Central Europe plan.
This is where many Schengen applicants get surprised. Vienna and Budapest are in different countries, and the officer now has to validate:
- Why is the arrival country not the main destination you selected
- Whether your itinerary supports “first entry” rules
- Whether the trip path is coherent without extra flights showing the movement
A simple rule we use for 2026-style file reviews:
- If your open-jaw changes countries, you must be extra strict about consistency with your Schengen form fields like first entry and main destination.
The Missing Middle Problem: Your Ticket Leaves A Gap That Reviewers Will Fill Themselves
Open-jaw fails when the middle is unclear, not when the flights look fine.
A consulate officer sees two flights:
- Entry flight into City A
- Exit flight out of City B
They then ask a silent question: “How do they get from A to B, and does that path create a compliance risk?”
The risk spikes in these situations:
- The two cities are far apart with no obvious tourism link. Example: arrive Stockholm, depart Athens, with no explanation of why the trip jumps that far.
- The middle crosses a border that matters. Example: arrive in Spain, depart from Switzerland, and your form says the main destination is France.
- The timing is tight. Example: arrive Saturday night in Lisbon, depart Monday morning from Prague. The gap looks implausible.
We can prevent guessing with a “middle gap test” before submitting:
- Can a reviewer understand the middle using one sentence?
- Does the middle stay within your declared destination logic?
- Does the gap length look like real travel time, not an error?
If the answer is “no,” adjust one of three things:
- Move the departure city closer to the arrival city
- Add one additional flight leg (turning it into a minimal multi-city)
- Add a short, factual note that explains the middle without adding new complexity
When Open-Jaw Strengthens Proof Of Exit (Instead Of Weakening It)
Open-jaw is at its best when your trip is naturally one-directional.
This comes up a lot in these visa contexts:
Schengen short-stay with a linear route
If you genuinely plan “Portugal then Spain,” an open-jaw like arrive in Porto, depart Barcelona can match your travel story. It can also help you avoid backtracking just to “make a return flight look tidy.”
What makes it stronger than a return in this case:
- The route supports a real overland plan across a neighboring country.
- The exit date can still sit cleanly inside the stay you requested.
- You avoid the awkward look of “arrive on one side of Europe and fly back from the same city after crossing the region.”
UK Standard Visitor with a regional add-on
If your plan includes the UK plus a short side trip elsewhere, open-jaw can be clean if the exit is explicit and dates align. Example: arrive in London, depart Manchester, and return home after internal travel.
Japan visa, where you will not loop back to the first city
A Japan itinerary like arrive Tokyo, depart Fukuoka can fit a realistic tourism path. It also reduces questions if your supporting day-by-day plan already lists a southbound route.
Open-jaw weakens proof of exit when the exit is not actually a meaningful exit. For instance, an open-jaw that only changes airports inside the same metropolitan area can look pointless and invite scrutiny. Make the city change serve a real travel reason.
Land/Train/Ferry Between Cities: How To Avoid “Unprovable Movement” Anxiety
Many open-jaw itineraries rely on trains, buses, or ferries in the middle. That is normal travel. The problem is that your visa file often shows flights only, so the middle can look invisible.
Use a “minimum evidence menu” based on the destination.
For Schengen rail-heavy routes
If you arrive in Milan and depart from Zurich, reviewers understand there is a direct rail link. You usually do not need to submit train tickets. But you do need:
- Dates that allow realistic movement
- A main destination choice that matches your longest stay
- An open-jaw pairing that does not contradict your entry country declaration
For island or ferry-dependent moves
If you arrive in Athens and depart from Santorini back home, the middle depends on a domestic flight or ferry. This can be fine, but avoid middle timings that require same-day ferry miracles. Leave at least one buffer day if your exit flight is early.
For cross-border overland segments where border logic matters
Example: arrive in Croatia, depart from Slovenia. If your file is Schengen-focused, this can confuse the “zone entry” narrative unless your dates and declared destinations match.
When you need to show the middle without overloading your submission, keep it tight:
- One line in your itinerary note: “Travel between cities by train. Route aligns with declared stay dates.”
- Avoid attaching multiple alternative middle routes that create conflicting dates.
Also watch for a practical airline issue: if your open-jaw includes a low-cost flight in the middle that is separate from your main booking, airline staff checking you in for the first flight may not consider it as proof of onward travel. That is when a minimal multi-city in one view can reduce friction.
Departing From Delhi, Entering One City, Exiting Another
Consider a Schengen applicant departing from Delhi who plans a one-directional trip across Western Europe.
A clean open-jaw example:
- Delhi → Lisbon
- Overland travel across Portugal and Spain
- Barcelona → Dubai → Delhi (or any clear non-Schengen exit routing that fits your plan)
Why this open-jaw tends to read well in a Schengen file:
- Your exit flight leaves the Schengen Area clearly.
- Your dates can match your requested stay without pushing to the maximum.
- Your main destination can be supported by where you spend the most nights, even if you entered through a different country.
The key consistency check before submission:
- If your Schengen form lists your first entry as Portugal, your arrival must actually be in Portugal, not Madrid.
- If your form lists the main destination as Spain, your supporting plan must show Spain as the longest stay, not just the exit airport.
Keep the middle movement believable. If Lisbon to Barcelona is shown as a two-day trip with multiple cities, give yourself enough nights so the route looks like tourism, not a placeholder.
When open-jaw starts to feel like you are forcing a story, it may be time to switch to a multi-city booking that shows one middle leg explicitly, especially if the gap crosses multiple borders or relies on tight connections.
Multi-City Bookings: The Most Convincing Proof Of Exit - Or The Fastest Way To Create Red Flags
Multi-city itineraries can make proof of exit feel “obvious” because they show your trip as a sequence, not a promise. They can also raise flags faster than any other format when the route looks engineered or compliance-heavy.
Why Multi-City Can Be “Stronger Than Return” For Proof Of Exit
Multi-city works best when a visa officer needs to see more than a neat round trip to feel confident about your exit.
A clear example is a Schengen short-stay where your real plan is linear. If your application lists a route like New York → Amsterdam, then you travel onward and exit with Barcelona → New York, a return ticket forces you to “snap back” to Amsterdam. A multi-city lets you show:
- Entry into the Schengen Area
- One internal move that matches your stated itinerary
- A final leg that clearly exits the Schengen Area
That structure helps when the consulate expects your first entry and main destination to make sense together. If your form says first entry Netherlands and main destination Spain, a multi-city like NYC → Amsterdam, Amsterdam → Barcelona, Barcelona → NYC reads like a coherent trip instead of a puzzle.
Multi-city can also strengthen island and visa-on-arrival contexts, where airlines often ask for onward travel. If you arrive in Phuket and your proof shows Phuket → Bangkok only, that is onward travel within Thailand, not an exit. A multi-city trip that ends with Bangkok → Kuala Lumpur makes the departure from Thailand explicit on the same itinerary view.
Multi-city is also useful for Japan temporary visitor files when your trip ends outside Japan. A route like Los Angeles → Tokyo, Tokyo → Sapporo, Osaka → Taipei shows a clean exit to Taiwan, which reads differently than a generic “return later” plan.
The practical advantage is not “more flights.” The advantage is less guesswork about where and when you leave the jurisdiction you entered.
The Multi-City Mistake That Gets People Rejected: Overengineering
The fastest way to make a multi-city itinerary look suspicious is to pack it with unnecessary legs.
Overengineering often shows up as “busy” routing that does not match the purpose of a tourist or visitor visa.
Watch for these patterns in Schengen applications:
- Too many border crossings in too few days. Example: Paris → Brussels → Cologne → Zurich → Milan in six days can look like a constructed loop.
- Segment timing that ignores reality. Example: landing in Rome at 10:00 and departing from Berlin at 13:00 the same day looks like a spreadsheet plan, not a trip.
- Redundant legs that do not add proof value. Example: adding Madrid → Valencia by air when your file already describes train travel can create questions about why you chose a flight at all.
Overengineering also creates airline problems in places where check-in staff want a simple answer. If you fly Johannesburg → Dubai and your onward proof is buried as leg 4 of a seven-leg itinerary, you can still end up explaining it at the counter.
We keep multi-city lean by separating “what proves exit” from “what adds noise.”
A quick overengineering filter:
- Does this leg prove entry, exit, or a necessary internal move that supports your declared itinerary?
- If it proves none of those, remove it.
If your plan is a UK Standard Visitor trip based in London with a side day trip, do not add domestic flights like London → Manchester → London unless your application also explains why you are flying. It can look like you added segments for optics, not travel.
Building A Multi-City That Reads Cleanly In One Scan
Multi-city succeeds when a reviewer can understand it in one glance and validate it without chasing missing pieces.
We build “one-scan” multi-city itineraries using three rules: two-leg minimum, three-leg maximum, and a visible exit.
Rule 1: Two-leg minimum
You need at least:
- A leg that shows entry into the destination jurisdiction
- A leg that shows exit out of that jurisdiction
Example for New Zealand Visitor Visa:
- San Francisco → Auckland
- Christchurch → Sydney
This makes the exit from New Zealand obvious because Australia is a separate jurisdiction.
Rule 2: Three-leg maximum for most visa files
Three legs can be ideal when you want to show one internal move that matches your story.
Example for Schengen short-stay with a Spain-focused plan:
- Toronto → Madrid
- Madrid → Paris
- Paris → Toronto
This shows entry, a plausible mid-trip move, and a clear exit from Schengen.
Rule 3: Put the exit leg last and make it unmistakable
Exit should not be a domestic hop. It should be a leg that crosses the jurisdiction boundary you are proving.
Exit clarity examples:
- For Thailand, end with Bangkok → Singapore, not Bangkok → Chiang Mai
- For Schengen, end with Rome → Istanbul or Rome → London, not Rome → Paris
- For Japan, end with Osaka → Seoul, not Osaka → Tokyo
Then run a “clean scan” checklist before you upload:
- All legs are in date order and do not overlap across time zones in a confusing way
- Airports match your story (if your application says “stay in southern Spain,” do not fly into northern France)
- The main destination is supported by where your nights are, not just by where your exit airport sits
- No hidden self-transfer surprises like airport changes inside a connection city
If you want to reduce questions further, keep the middle leg geographically logical. For a Schengen plan, Berlin → Prague reads as a normal short hop. Berlin → Athens can still be real, but it forces the reviewer to re-interpret the whole itinerary.
Transit And Jurisdiction Stacking: Where Multi-City Quietly Turns Into A Compliance Puzzle
Multi-city itineraries can accidentally create a “visa inside the visa” problem when you stack transit jurisdictions.
This is where applicants get caught off guard: the destination visa can be fine, but the routing triggers extra requirements or extra scrutiny.
Common stacking situations:
1) Transit through a country with strict transit controls
A route like Cairo → London → Toronto can be a normal transit, but some passports face different transit conditions depending on whether they stay airside, change terminals, or have an overnight connection. If your proof-of-exit itinerary depends on a complicated transit city, you risk turning “proof of exit” into a transit compliance discussion.
2) Airport changes in a transit city
An itinerary like Bangkok → Tokyo (Haneda) then Tokyo (Narita) → Los Angeles can be a legitimate airport move, but it often implies entering Japan to transfer. That can raise questions if your itinerary is being used to prove exit from Thailand, and you have no plan to enter Japan on that trip.
3) Self-transfer legs that break visibility
A multi-city plan can look unified on a PDF but behave differently in real-life check-in systems if legs are separate bookings. If you are flying Casablanca → Istanbul and your “exit” leg is Istanbul → Berlin on a different booking, staff may focus on the first ticket and treat you as having no onward travel. This comes up often on routes involving low-cost carriers.
4) Double backtracking that looks like gaming
A route like Mexico City → Madrid, Madrid → Lisbon, Lisbon → Madrid, Madrid → Mexico City can be real, but it often reads like you are trying to keep a return structure while also pretending to have a linear plan. For Schengen, it can also confuse your “main destination” logic.
We avoid compliance puzzles by simplifying transits and limiting jurisdiction jumps:
- Choose transits that do not require airport changes
- Avoid overnight connections when you can
- Keep the exit leg direct to a third country when possible
- Keep the total number of jurisdictions low on the proof itinerary, even if your real trip later becomes more complex
If the route must be complex, we make the complexity purposeful. A multi-city itinerary that includes one well-chosen transit is usually easier to defend than one that includes three discretionary transits.
Mumbai Start, Different Exit City, Third-Country Hop
Consider an applicant starting in Mumbai with a Southeast Asia plan that ends outside the destination country to make proof of exit unmistakable.
A clean multi-city example:
- Mumbai → Bangkok
- Bangkok → Chiang Mai (only if your itinerary includes northern Thailand, otherwise skip this)
- Bangkok → Singapore
Why this structure tends to work for proof of exit:
- Your final leg shows a clear departure from Thailand to Singapore.
- Your dates can align with a typical short stay without looking stretched.
- The exit leg is easy for airline staff to recognize at check-in because it is a cross-border flight.
Two details keep it from turning into a red-flag route:
- Keep the middle leg optional. If it does not support your declared plan, remove it.
- Make the exit date comfortably inside your allowed stay. Do not park it at the maximum day count unless your file supports a long trip.
If your trip is actually Thailand plus Singapore, you can also reverse the structure to keep the “exit” leg tied to the country you entered. But the principle stays the same: the final segment should clearly cross the boundary you must prove, not just move you around inside the same place.
Once you understand how multi-city can either simplify or complicate your proof of exit, the next step is choosing the right format using a decision tree that matches how your application will be judged.
Pick Return Vs Open-Jaw Vs Multi-City Based On How You’ll Be Judged
Now we choose the ticket shape that proves exit with the fewest questions. Use this decision tree like a pre-submission filter before you lock your itinerary.
Step 1: Are You Proving Exit From A Country Or From A Region?
This step decides whether “onward” is enough or whether you must show a true exit.
If your destination is a region, your exit must leave that region, not just move within it.
- Schengen short-stay: Paris to Rome is a movement inside Schengen. It does not prove that you leave Schengen. Your itinerary needs a leg like Rome → London or Rome → Istanbul if your proof goal is exit from the zone.
- Caribbean island entries: Nassau to Freeport stay inside the Bahamas. It does not read as exit. A leg like Nassau → Miami is a clearer proof-of-exit signal for airline staff and border officers.
- Gulf stopovers: Dubai to Abu Dhabi stay inside the UAE. It is not proof of leaving the country. If your entry relies on showing you depart, you want a leg like Dubai → Muscat or Dubai → London, depending on your plan.
If your destination is a single country, a cross-border onward flight can be enough, but it must be obvious.
- Japan temporary visitor: Osaka → Seoul is a clean exit from Japan.
- South Korea tourist plan: Seoul → Taipei reads as a clear exit.
Decision output for Step 1:
- Region trip: bias toward multi-city or open-jaw with a clear out-of-region exit.
- Single country trip: return or open-jaw can be enough if the exit is obvious.
Step 2: Does Your Trip Have A Single Home Base Or A One-Direction Path?
This step decides whether the return is natural or whether the return forces backtracking.
If your plan has a single home base, return is usually the cleanest fit for visa review.
- UK Standard Visitor staying in London: a simple London in, London out pattern aligns with a single-city stay plan and avoids “why did you end in a different city?” questions.
- Canada TRV visiting family in Vancouver: return looks normal because your stay is anchored to one location.
If your plan is one-directional, return can look like a detour, especially on regional trips.
- Schengen route that starts in Portugal and ends in Spain: a return out of the first city can look like you are forcing symmetry. Open-jaw or multi-city can match the direction of travel without needing you to “loop back.”
Decision output for Step 2:
- Single base: start with return, unless another step forces a different choice.
- One-direction: start with open-jaw, and escalate to multi-city only if clarity is needed.
Step 3: Do You Need To Show Movement Within The Destination, Or Only The Exit?
This step prevents “extra legs” that add scrutiny without adding value.
If your visa context only needs a clear exit, do not add internal flight legs just to look complete.
- Australia Visitor (subclass 600) holiday in Sydney: you usually do not need a domestic segment like Sydney → Melbourne to prove exit. What matters is a departure from Australia, like Sydney → Auckland or Sydney → Singapore, depending on your plan.
- UK visit with a fixed departure date: internal movement does not prove anything to the visa officer if your application already states a simple visit.
If your application story includes a planned internal move that affects your declared route, one middle leg can support coherence.
- Schengen form lists multiple cities and countries: if you claim you will spend time in two areas, a minimal entry → internal move → exit itinerary can reduce “how do they get there?” doubt when the move is large.
- Japan itinerary lists Tokyo then Hokkaido: a middle leg can match the plan, but keep it realistic and spaced.
Decision output for Step 3:
- Only need exit: choose return or open-jaw.
- Need to show a major move that your application relies on: choose a minimal multi-city, not a long chain.
Step 4: How Many Jurisdictions Are You Touching (Including Transit)?
This step catches itineraries that accidentally create visa or check-in friction through transits.
Count jurisdictions like this:
- Destination country or zone
- Transit countries where you change airports, overnight, or self-transfer
- Final exit country
Then decide whether your itinerary creates unnecessary compliance questions.
Examples where jurisdiction matters:
- Schengen proof using a transit that requires an airport change: your exit might be correct, but the transit can become a problem at check-in.
- One-way arrival into Singapore with exit via a complex multi-stop route: staff may struggle to interpret it quickly during check-in, even if it is valid on paper.
A low-friction benchmark:
- 1 destination jurisdiction + 0 or 1 straightforward transit + 1 exit jurisdiction
If you exceed that, simplify the itinerary you submit for proof of exit, even if your real travel later becomes more complex.
Decision output for Step 4:
- 2 to 3 total jurisdictions: any format can work. Choose based on clarity.
- 4+ jurisdictions: avoid multi-city chains. Prefer return or a simple open-jaw with a direct exit.
Step 5: What’s Your “Weakest Link” Risk?
This step chooses the format that protects you from the most likely challenge point.
Identify your weakest link from these three patterns:
- Airline check-in is a risk: common when you fly one-way into places where onward proof is often requested at the counter. If your weakest link is check-in, choose a format that is instantly readable.
- Safer picks: return or multi-city with a clear last leg out of the country.
- Risky picks: open-jaw where the exit city is far from the entry and the middle is not obvious.
- Consulate interpretation is the risk: common on first-time Schengen files or when your form fields must line up tightly with your itinerary.
- Safer picks: return if you have a single base, or minimal multi-city if your trip is linear and crosses the zone.
- Risky picks: country-open-jaw that changes the story of the first entry and main destination without support.
- Border questioning is a risk: common when your itinerary is short, unusual, or has a gap that looks hard to verify.
- Safer picks: multi-city with a visible exit segment that is easy to check.
- Risky picks: split bookings where the exit exists but is hard to show in one view.
Decision output for Step 5:
- Pick the format that makes your weakest link easiest to answer in one sentence, with documents that match.
Output Map: If You Answered X, Choose Y (With “Safer Alternative” Options)
Use this mapping to make a final choice.
If you are proving exit from a region (like Schengen):
- Choose: Multi-City
- Example structure: Enter zone → One move that matches your plan → Exit zone
- Safer alternative: Open-Jaw
- Only if your exit flight clearly leaves the zone and your first entry and main destination fields still align
- Avoid: a “return” that never leaves the zone on paper
If you have one base city and strict alignment matters (UK Standard Visitor, Canada TRV visit, short Japan stay):
- Choose: Return Ticket
- Best when your trip begins and ends in the same place, and your dates are fixed
- Safer alternative: Open-Jaw
- Only if the different departure city is still within the same country, and the middle is obvious
If your trip is one-directional and you do not want forced backtracking:
- Choose: Open-Jaw Itinerary
- Best when arrival and departure are within the same visa jurisdiction or the exit is clearly outside it
- Safer alternative: Minimal Multi-City
- Add a single middle flight only when the gap creates doubt or the distance is too large to “assume.”
If your weakest link is airline check-in and you need fast acceptance:
- Choose: Return Ticket or Two-Leg Multi-City
- Two-leg multi-city means entry plus a clear cross-border exit
- Safer alternative: Open-Jaw
- Only if the exit leg is unmistakable and does not rely on invisible middle segments
If your itinerary touches many jurisdictions through transit:
- Choose: Return Ticket
- Keep routing simple and reduce airport changes and overnight connections
- Safer alternative: Open-Jaw
- Only if it reduces transits rather than adding them
Once you know which format fits your case, the next step is building the reservation so it stays verifiable and consistent all the way through the visa decision.
Build A Proof-Of-Exit Reservation That Stays Verifiable Until Approval
Once you choose return, open-jaw, or multi-city, the next job is making the reservation hold together under real checks. We build for consistency across your visa form, your PDF, and what airline staff can read quickly.
Part 1: Lock Your Story Before You Lock Your Segments
Before you touch dates or flight numbers, lock three facts. This prevents the common problem of changing one leg and accidentally breaking your whole application story.
Lock these first:
- Entry point: the city and country where you first arrive (matters for Schengen first entry).
- Exit point: the city and country or zone you will depart to (matters for proving exit from a region).
- Stay window: the range you will be inside the destination (must match your visa form and supporting documents).
Then pressure-test the story against the visa type.
For Schengen short-stay, run this alignment check:
- Your first entry country matches your arrival airport.
- Your main destination matches the country where you spend the most nights.
- Your exit flight leaves the Schengen Area, not just moves within it.
For a UK Standard Visitor, run a different check:
- Your entry and exit dates match what you stated in your application fields.
- Your trip length matches your leave evidence and financial pattern.
- Your itinerary does not imply a longer stay than the documents support.
For Japan temporary visitor, focus on stay coherence:
- Your entry and departure dates fit inside a realistic visit.
- Your route does not require an “invisible” domestic move the next day that looks rushed.
Only after those checks should you decide the ticket shape you will actually show in your proof.
Part 2: Choose The Format That Minimizes Explanations
Now choose the format that reduces the number of questions a reviewer must ask.
Use this “explanation minimizer” filter:
- Return: choose it when your entry and exit cities naturally match, and you do not need to show any internal flight logic for your story to make sense.
- Open-Jaw: choose it when a one-direction route is real, and the middle is obvious without proof, like a well-known rail corridor inside Schengen.
- Multi-City: choose it when the missing middle would cause doubt, or when you must show an explicit exit from a region.
Then make one tactical decision based on your destination.
If your main risk is Schengen interpretation, avoid country-open-jaw unless your first entry and main destination fields still line up cleanly.
If your main risk is airline check-in, avoid hiding the exit inside a complex chain. Make sure the last leg that leaves the country is easy to spot.
If your main risk is border questioning, avoid split visibility. Put the exit in a form that you can show quickly, and that reads as one coherent plan.
Part 3: Run The Consistency Audit (The Stuff That Actually Triggers Doubt)
Consistency is where strong applicants still lose time. This is the part that feels small, but it is what makes a file read as stable.
Run this audit in order.
1) Name and passenger identity
- Check spelling against your passport, including middle names.
- Keep the same order of names across your visa form and reservation.
- Avoid using different transliterations across documents if your passport has a fixed spelling.
2) Date and calendar alignment
- Confirm that the dates on the reservation match the dates on your visa application fields.
- Watch for time zone shifts that change the calendar day.
- Example: a late-night departure on one side of the world can land “two days later” locally, and your form may still show the original date if you typed it quickly.
3) Geography alignment
- City and airport names must not conflict across your file.
- If your form lists “Rome,” do not submit an itinerary that arrives at a different country’s airport and expect the officer to infer your internal travel.
4) Jurisdiction logic
- For Schengen, confirm the exit flight leaves the zone.
- For single-country trips, confirm the departure is clearly outside that country.
5) Timing plausibility
- Avoid zero-buffer itineraries like landing in a country and departing from a distant city the next morning.
- Leave enough time for realistic movement between your stated locations.
Use a final “two-minute scan” before uploading:
- Do the flights match what you wrote in the application?
- Does the route support your declared main destination?
- Does the last flight unmistakably prove you leave the place you need to leave?
Part 4: Make It “Checkable” Without Inviting New Questions
Your proof-of-exit reservation should be easy to read and easy to verify. It should not introduce optional routes that create confusion.
Keep the document content focused on what the reviewer needs:
- Your name
- Routes and dates
- Flight numbers
- Booking reference, if present
- The full sequence in one view for multi-city
Avoid adding “extra context” that creates risk:
- Multiple alternate versions with different dates
- Different routing options in the same PDF
- A second itinerary that contradicts the first, even slightly
If you are submitting for Schengen, “more pages” is not automatically better. A clean, consistent itinerary that matches your form and your trip plan often performs better than a thick bundle that forces the officer to compare options.
If you expect an airline check-in question, keep the proof easy to show on your phone. Staff respond well to clear answers. A multi-city itinerary where the final leg is a cross-border exit is easier to explain than a folder of separate segments.
dummyflights.com provides instantly verifiable reservations with a PNR and PDF, unlimited date changes, transparent pricing at $15 (~₹1,300), is trusted worldwide for visa use, and accepts credit cards.
Part 5: Handling Changes Without Breaking Your Narrative
Changes are normal. The risk is changing the itinerary in a way that creates a mismatch between what you submitted and what your application claims.
Separate changes into two categories.
Low-risk changes that usually keep the story intact:
- Shifting travel dates by a few days while staying inside the same stay window you requested
- Swapping flight times on the same route, so long as dates stay consistent
- Minor airport swaps inside the same city when your documents use the city name consistently
Story-breaking changes that can create problems:
- Changing the first entry country for Schengen after you already declared it
- Changing the exit from “leave Schengen” to “move within Schengen.”
- Moving the trip length far beyond what your documents support
- Switching from return to open-jaw without updating your form fields that imply a round trip
Use this change-control routine:
- Step 1: Check whether the change affects any visa form fields like entry country, main destination, or travel dates.
- Step 2: Check whether the change affects your proof of exit logic, especially for regional zones.
- Step 3: Update only what must change, and keep one coherent version of the itinerary for submission.
If your visa appointment is near and you need to move dates, keep the structure stable. A small date change is easier to defend than a full reroute that creates new questions.
If your trip includes a tricky transit, do not “solve” it by adding extra legs at the last minute. That often creates a jurisdiction stack that looks complicated and invites more scrutiny.
Once your itinerary is consistent and checkable, the remaining challenge is avoiding the uncommon failure modes that still trip people up, even with a solid reservation.
Where Applicants Get Burned: Exceptions, Risks, And Uncommon Failure Modes
Even when your proof of exit looks clean, small details can trigger extra checks at the embassy, the airline counter, or the border. These are the failure modes that show up when a passenger flies with a real itinerary that is hard to interpret under pressure.
The Airline Liability Problem: When Check-In Is Stricter Than The Embassy
Airlines are not judging your visa story. They are protecting themselves during air travel, especially on one-way tickets into countries where onward proof is frequently enforced at the counter.
This is where round-trip tickets often win. A return is easy to spot, even when staff are working fast. With an open-jaw ticket or a multi-city flight, staff may still accept it, but only if the exit leg is obvious in one view.
The strictest moments usually happen when:
- You check in for a one-way flight into Thailand, Indonesia, or the Philippines, and the staff asks for a confirmed exit.
- Your plan uses separate one-way tickets, and the exit is not visible on the same document.
- Your itinerary includes different airlines, and the staff cannot quickly confirm the full journey.
We can reduce check-in friction by presenting proof that answers one question: “Where do you leave this country or zone?” If your proof shows multiple destinations, keep the last segment clear and cross-border.
Pricing can also change what people try to present. Airline pricing strategies, fare codes, and baggage fees often push travelers into awkward structures that create check-in debates. Even if airlines offer competitive pricing on a low-cost segment, the wrong format can create a delay right before boarding.
How To Make A Return Itinerary Look Coherent Without Over-Optimizing It
Return proof fails when it looks engineered, not when it looks simple. Traditional round-trip tickets work best when they match what your visa form says and what your stay window supports.
If you are filing a Schengen short-stay, a traditional round-trip can look strong when:
- Your arrival airport matches your first entry field.
- Your departure airport matches your planned end point.
- Your dates fit the stay you requested and the documents you attached.
Return proof can look odd when you chase the “best deal” and accidentally break logic. For example, a standard round-trip pattern can be undermined if you arrive in one country, list another as the main destination, and then exit from a third country without time to move.
Return tickets also get weird when the timing looks artificial:
- Outbound and inbound that mirror each other too perfectly.
- Trip length that ends exactly at a maximum stay limit.
- A route that suggests you are barely in the country you said you would visit.
If you are tempted to “perfect” the itinerary, pause. The goal is coherence, not beauty. Traditional round-trip tickets should read like a normal traveler’s timeline, not a template.
Split Bookings And Separate PNRs: The Invisible-Itinerary Failure
Split proof fails because the reviewer cannot see your exit, even if you have it.
Three high-friction scenarios:
- A Schengen applicant submits an inbound flight only, then plans to show the exit later. The embassy may request proof again because the file does not show you leaving the zone.
- An airline agent sees only the first booking during the booking process and treats you as having no onward travel.
- Border control asks for proof of departure, and you can only show a partial screenshot that does not include the exit leg.
We can fix invisibility by making the exit leg easy to display:
- Put the exit segment on the first page of what you carry.
- Keep the exit city pair simple and cross-border.
- Avoid presenting multiple versions that disagree on dates.
If you are using one-way tickets for flexibility, treat visibility as the main risk, not the validity of the ticket itself.
Budget Carriers, Charter Flights, And Hard-To-Verify Segments
Some real itineraries are harder to verify quickly. This matters when your proof of exit depends on a segment that looks unusual in the format staff are used to reading.
Hard-to-verify segments often share these traits:
- Minimal passenger detail.
- A confirmation layout that looks like a request, not a reservation.
- Limited availability in how the itinerary displays across devices.
This is also where ticket prices can tempt people into odd structures. In off-peak seasons, you might see potential cost savings on a low-cost exit leg that looks different from your main booking. That can be fine, but keep the presentation clean, especially if your departure is your key proof-of-exit evidence.
Class and add-ons can change how your proof reads at the counter. Business class or first class documents often display clearly, but economy class bookings can sometimes show extra lines for add-ons and baggage fees that clutter the view. That clutter can distract from the one line that matters: your exit.
If your proof relies on a segment that is hard to read, do not fix it by adding more legs. Fix it by making the exit segment more checkable.
Open-Jaw Edge Cases: The Middle Segment That Creates Legal Doubt
Open-jaw can be excellent for real travel plans, but it creates a gap. That gap is where legal doubt appears.
There are different types of open jaw, and the risk depends on which one you use.
- Origin open jaw: you depart from a different home airport than where you returned, while still entering and exiting the same region.
- Destination open jaw: you arrive in one city and depart from another city within the destination region.
A double open jaw can be a valid travel, but it is the easiest way to invite questions because both ends change. For a Schengen file, that can force the officer to reconcile your original point, your entry, your exit, and your stated main destination.
People often ask how open-jaw flights get interpreted in practice. The answer is simple: the middle must look plausible without a long explanation. If your entry is in City A and your exit is from City C, the time between those dates must support the movement.
Avoid the open-jaw patterns that trigger doubt:
- Entry and exit cities that are far apart, with a short stay.
- Entry that implies a border crossing that your application never mentions.
- booking open-jaw flights that change countries in a way that conflicts with “first entry” and “main destination” fields.
Open-jaw works best when the gap feels natural, and the exit clearly leaves the jurisdiction you must exit.
Multi-City Edge Cases: Transit That Quietly Turns Into A Visa Issue
Multi-city can prove to exist very well, but it can also create hidden obligations through transits.
The multi-city option becomes risky when:
- You change airports in a transit city, which can imply entry into the transit country.
- You rely on self-transfer, which can trigger document checks that you did not plan for.
- You stitch together several cities on separate confirmations and expect staff to combine them mentally.
This risk is not just about the destination. It is about the chain. A multi-city plan that touches many jurisdictions can create more check-in questions than standard round-trip plans, even if the embassy would accept it.
A practical guardrail:
- Use a multi-city only when you need it to prove exit or to make the route logically match your declared itinerary.
- Keep the number of legs small, even if you want to explore multiple destinations on your next trip.
Multi-city is popular with business travelers and for a business trip, but those itineraries often include tight connections and frequent country hops. That is where visa officers and airline staff can start reading the route as higher risk unless the exit is crystal clear.
Myth-Busting: The Five Beliefs That Cause Proof-Of-Exit Rejections
- “One destination means one ticket format.” Not always. Sometimes a return is best, sometimes open-jaw is better, and sometimes multi-city is needed to show a true exit.
- “Open-jaw is always more expensive than a round trip.” Not reliably. Factors influencing ticket prices include seasonality, routing, and fare rules, but for proof of exit, we care more about clarity than price.
- “A multi-city is always safer.” A complex route can create more transit questions than it solves.
- “Travel agents can fix any proof issue at the counter.” They can help with bookings, but staff still need to see a clear exit immediately.
- “You can pick any airline, and it will read the same.” Many airlines display itineraries differently, and that affects how quickly staff can verify the exit.
Mistake Checklist: Pre-Submission Red Flags By Ticket Type
Use this checklist right before you submit your file or head to the airport.
Return:
- You use round-trip tickets, but the airports do not match your form fields.
- Your return date conflicts with your declared leave window.
- The route backtracks to the original city for no stated reason.
Open-Jaw:
- You present jaw tickets, but the middle movement is not plausible for the dates shown.
- You use a destination open jaw that stays inside Schengen when you need to prove exit from Schengen.
- You leave staff guessing about how you will visit multiple cities.
Multi-City:
- Your sample itinerary includes multiple destinations, but only one leg proves exit.
- You rely on separate bookings across different airlines, and the exit is hard to show in one view.
- You build one trip with too many jurisdictions, which increases the chance of a transit compliance question.
One-minute final check:
- Does the itinerary clearly show you leaving the correct country or zone?
- Does it match your travel plans and the dates you submitted?
- Can you show it fast enough to save time at check-in?
From here, we can close with a conclusion that helps you choose the right format for your journey without creating new questions at the last step.
Return Ticket Vs Open-Jaw Vs Multi-City: Choose The Ticket Shape That Gets You Cleared Twice
For Schengen files, UK Standard Visitor applications, and Japan temporary visitor entries, your flight proof has to work in two places: the consulate review and the airline check-in desk. We choose return when your trip has one base, open-jaw when your route is truly one-direction, and multi-city when you must make the exit from the zone unmistakable. Then we keep every date, city, and airport aligned with what you typed in the form.
Before you submit, run one last scan for a clear out-of-country or out-of-Schengen exit, realistic timing, and a single consistent itinerary view. If you want a quick gut check, read the route out loud and confirm it matches your plan in one clean sentence.
Why Travelers Trust DummyFlights.com
DummyFlights.com has been helping travelers since 2019 with a clear focus on verifiable dummy ticket reservations only. The dedicated support team is a real registered business that has supported over 50,000 visa applicants with secure online payment and instant PDF delivery. Every reservation includes a stable PNR that travelers can verify themselves before submission, and the platform offers 24/7 customer support to answer questions at any stage of the visa process. DummyFlights.com never uses automated or fake tickets — every document is generated through legitimate airline reservation systems and can be reissued unlimited times at no extra cost if your plans change. This niche expertise and transparent process is why thousands of applicants return for every new visa application.
Related Guides
More Resources
About the Author
Visa Expert Team — With over 10 years of combined experience in travel documentation and visa assistance, our editorial team specializes in creating verifiable flight and hotel itineraries for visa applications. We have supported travelers across 50+ countries by aligning documentation with embassy and immigration standards.
Editorial Standards & Experience
Our content is based on real-world visa application cases, airline reservation systems (GDS), and ongoing monitoring of embassy and consular documentation requirements. Articles are reviewed and updated regularly to reflect current practices.
Trusted & Official References
Important Disclaimer
While our flight and hotel reservations are created to meet common embassy requirements, acceptance is not guaranteed and may vary by country, nationality, or consulate. Applicants should always verify documentation rules with the relevant embassy or official government website prior to submission.